All Categories
Featured
Table of Contents
- – Fifth Wheel Service Pomona, CA
- – OCRV Center
- – 5th Wheel Repair Near Me Pomona, CA
- – Travel Trailer Ceiling Repair Pomona, CA
- – Cargo Trailer Repair Pomona, CA
- – Travel Trailer Replacement Windows Pomona, CA
- – Rv Trailer Service Near Me Pomona, CA
- – Trailer Floor Repair Pomona, CA
- – Rv Trailer Service Near Me Pomona, CA
- – Travel Trailer Ceiling Repair Pomona, CA
- – Fifth Wheel Service Pomona, CA
- – Travel Trailer Roof Replacement Pomona, CA
- – Horse Trailer Repair Near Me Pomona, CA
- – Travel Trailer Furniture Pomona, CA
- – Fifth Wheel Service Pomona, CA
- – Trailer Floor Repair Pomona, CA
- – OCRV Center
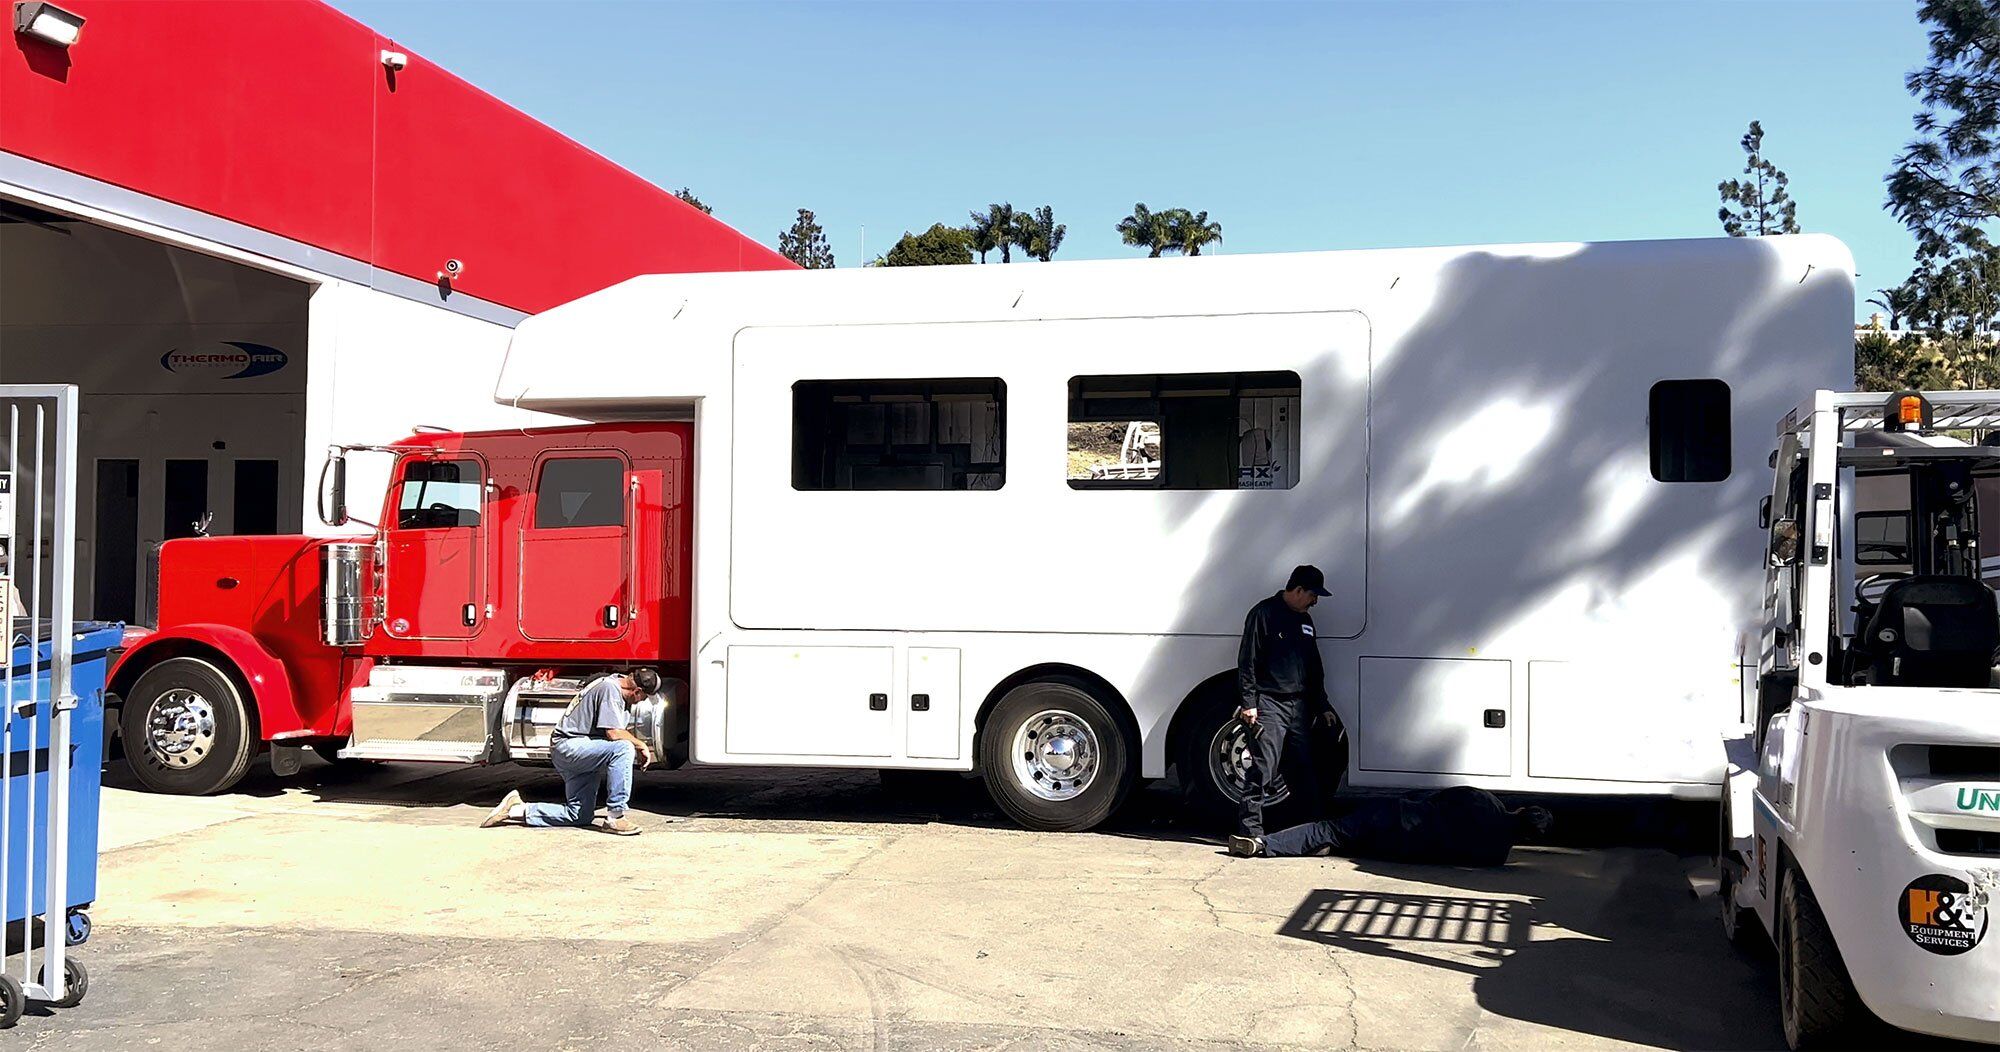
Fifth Wheel Service Pomona, CA
Tony's recreational vehicle Parts and Service, Inc. brings the biggest parts inventory in the South and has a variety of hard to obtain parts. We focus on supplying a large range of services and components for recreational vehicles (RVs). We offer various services such as RV repair service, maintenance, and installation of parts and devices.
Discover unequaled solution and dependability with us today. We service Beaver Dam, AZ to Leeds consisting of Ivins, St. George, Storm, and Zion. You definitely have questions, and you just intend to consult with a real individual. Give us a call, we answer the phone. You can additionally load out the "Get a Quote" form.
5th Wheel Repair Near Me Pomona, CA
We are focused in Grand Junction, Colorado and offer consumers in Mesa County. Our Certification training was done at the National Motor Home Training Academy and we are certified by the RV Technician Association of America. You can feel positive the work will certainly be done.
Device Inspections & ServiceWe can function on a wide variety of motor home home appliances and systems such as air conditioning system, water heating units, awnings, heating systems, ovens and ranges, fridges, and water supply (Rv Trailer Repair Shops Near Me Pomona). Roof Inspections & Upkeep We can look for and repair cracks, spaces, and tears in the roofing along with work with harmed air vent covers and fractured seals
Whenever you travel you shouldIt is necessary to examine your motor home before and after each trip, whether you bring it in for a check up or do it yourself. Below are some points you should be examining each time you hit the trail: Headlights/brake lights Tires and lugs Link to tow lorry Under the hood (motorhomes) Semi-annually you shouldRV's are constructed of elements that start to put on out in time.
Travel Trailer Ceiling Repair Pomona, CA
We focus on doing fixings, maintenance, minor paint and body repairs and maintenance of Lance Camper & Travel Trailers devices. For many people, their Lance Camper or Trailer will certainly be the second biggest purchase of their life besides their home, and for many of our consumers, it is their home.
Having your Lance Camper or Trailer fixings, solutions and maintenance kept regularly can suggest the distinction in between a RV adventure and a motor home farce. What sets our repair service shop besides a car dealership is we are not below to sell you a new one, we are here to repair and maintain what you have.
Cargo Trailer Repair Pomona, CA
We also share Lance Camper & Trailer that are on our lot. Be certain to take a look at his YouTube channel where he shares what's going on in the store and the item offerings in the shop. Dustin is likewise very energetic on Facebook. Join his team, recreational vehicle Repairs Store and Tips & Suggestions In The RV Shop with Dustin If you're incapable to bring your unit in for upkeep or repairs or if you're seeking to deal with an upgrade as a DIY job we've obtained you covered! Visit our for every little thing you'll need, including fundamental components, devices, and tools to assist you maintain your RV.
I choose to give Mike a shot based on his wonderful testimonials and every person was accurate except the expect consumer that left a less after that five celebrity evaluation. Mike too didn't make me seem like just a client, yet felt like he was a good buddy of mine ready to provide a helping hand.
Travel Trailer Replacement Windows Pomona, CA
When you visit Almaden RV, you can meet numerous members of the Caprino Family. Possessed and operated since 1989, Chris and his family very regard and respect the relationship with their customers. It's a location where the staff takes the time to cover every little thing thoroughly so there are no questions left unanswered.
You can see their many accreditations on the wall surface during your following browse through. Over 25 years of trusted affiliation with the manufactures offers Almaden recreational vehicle one-of-a-kind access to difficult to get responses that many shops are unable to get. When in question, they do not "wing it", Almaden motor home finds the responses and finishes the job right the very first time.
Rv Trailer Service Near Me Pomona, CA
From routine upkeep services to cleansing the inside, you require to be persistent concerning how you care for your RV. We want to help make the process simpler at Cranberry Automobile Solution Facility, and we do that via our thorough Motor home repair solution.
We intend to make certain that never takes place, and we attain that by enlightening our consumers. Below are some usual problems you'll see in your recreational vehicle and what you ought to do: Even if you drive the most contemporary RV, your lorry will likely experience water leaks. This is inevitable, as all RVs at some point catch the components in some shape or form.
Together with coming in for service to patch up the leak, likewise thinking about investing in a high-grade motor home cover, which will certainly safeguard it from the aspects when it's not in use. If your RV is having electrical troubles, whether a light switch isn't functioning or the fronts lights are dark, it is very important to reach out to a certified professional.
Trailer Floor Repair Pomona, CA
Valid only at getting involved Outdoor camping Globe areas. See dealership for information. Government fees, state taxes, dealership costs and exhausts testing costs as appropriate will certainly be included to abide with state lorry codes.
We have actually striven to guarantee accuracy in the details offered. New device digital photography for illustration purposes only. Specs, equipment, technical data, photographs and images are based upon info readily available at time of publishing and go through alter without notification. Stock and floorplans vary by area, not all promoted makers readily available at getting involved dealers.
Might not be combined with any kind of other deal and not appropriate to prior sales. Offer(s) valid at any kind of Outdoor camping Globe RV Sales or FreedomRoads dealership only. See dealer for details. 2025 FreedomRoads, LLC. CAMPING WORLD and the CAMPING globe Logo design are signed up hallmarks of CWI, LLC. and made use of with approval.
All civil liberties scheduled. FreedomRoads LLC, its relevant dealerships and modern technology partners are exempt for typographical errors in cost or mistakes in summary of condition of a vehicle's recognized devices, accessories, rate or service warranties. Any type of and all distinctions should be addressed prior to the sale of this car. Decision to offer a motor home no matter cost is solely determined by the marketing dealership. * Finest deal or $1,000 - deal has to remain in creating and acquired from a licensed motor home dealership.
Rv Trailer Service Near Me Pomona, CA
To obtain assured trade-in value and/or appraisal, vehicle must be in exact same or substantially the exact same condition it was in at time of deal. All offers are subject to inspection.
Client needs to provide legitimate customers order authorized by management of contending dealer and appropriate documents detailing model year, make, brand name, design, choices, specs, colors, and vin # of marketed system. Customers order valid for 1 month from time of write. Competing dealership will be any type of certified RV dealer as identified by the State in which the dealership operates and is not an Outdoor Camping Globe Recreational Vehicle Sales or FreedomRoads dealer.
Travel Trailer Ceiling Repair Pomona, CA
Any relevant trade-in should be revealed and supplied for evaluation at time of demand. Not appropriate to previous sales. See dealership for details. Not valid in California. Space where prohibited.
A motor home won't last forever. After several journeys, you may discover the fridge isn't maintaining things cool down anymore or the hot water heater's pilot burner won't activate. The worst aspect of it is that when you are traveling out from southern Louisiana, you might find that there are issues with your appliances, electric system, pipes, or lights that will trigger you to transform the motor home around and head back home.
Our components option is constantly growing as we currently have products in the adhering to classifications: Generators, generator parts, refrigerator components and accessories, cooktop cooktops, dishwashing machine parts, microwaves, heating system and furnace parts, heating units, hot water heater, washer and dryer parts. Pipes for blackwater storage tanks, pipes for freshwater tanks, electric systems, LP gas systems, lights, and solar energy products.
Fifth Wheel Service Pomona, CA

You need to service your Motor home at the very least as soon as a year or every 5,000 to 10,000 miles, depending on use. For the response to all of your Motor home fixing requires across all of Southeastern Louisiana, give us a telephone call today!, and a member of our group will be more than happy to find a time that ideal fits you and your active schedule!.
Legitimate only at getting involved Outdoor camping Globe areas. See dealer for details. Government charges, state taxes, dealership fees and emissions screening charges as appropriate will be added to abide with state vehicle codes.
Specifications, tools, technological information, pictures and pictures are based on information readily available at time of publishing and are subject to alter without notice. Inventory and floorplans differ by place, not all promoted producers offered at taking part suppliers.
Travel Trailer Roof Replacement Pomona, CA
Might not be integrated with any type of various other offer and not suitable to previous sales. Deal(s) legitimate at any Camping Globe RV Sales or FreedomRoads supplier just. See dealer for information. 2025 FreedomRoads, LLC. OUTDOOR CAMPING WORLD and the CAMPING globe Logo are registered trademarks of CWI, LLC. and used with consent.
Decision to market a RV no matter of rate is entirely identified by the marketing supplier. * Best offer or $1,000 - deal should be in composing and obtained from a certified Motor home dealer.
Horse Trailer Repair Near Me Pomona, CA
To receive guaranteed trade-in value and/or assessment, car must be in exact same or considerably the very same condition it remained in sometimes of offer. All deals are subject to inspection. $1,000 cash will be tendered in the type of money, check, or money order. Not valid in LA or OR.
Client should offer valid customers order signed by management of competing dealer and correct paperwork outlining design year, make, brand, model, choices, specifications, colors, and vin # of promoted device. Customers order legitimate for 30 days from time of compose up. Completing supplier will be any kind of licensed RV dealer as acknowledged by the State in which the dealer runs and is not an Outdoor Camping Globe RV Sales or FreedomRoads dealer.
Travel Trailer Furniture Pomona, CA
Any kind of suitable trade-in must be revealed and attended to appraisal at time of demand. Not suitable to previous sales. See supplier for details. Not legitimate in California. Void where forbidden.
Legitimate just at getting involved CAMPING Globe places. See dealer for information. Federal government costs, state tax obligations, dealership costs and exhausts testing costs as suitable will certainly be added to comply with state car codes.
We have actually made every effort to ensure accuracy in the details given. New unit digital photography for illustration objectives just. Specifications, devices, technical information, photos and images are based on information offered sometimes of publishing and undergo alter without notice. Supply and floorplans vary by place, not all marketed makers available at taking part dealers.
Fifth Wheel Service Pomona, CA
May not be integrated with any type of other deal and not applicable to previous sales. Deal(s) legitimate at any Outdoor camping World RV Sales or FreedomRoads supplier only. See supplier for information. 2025 FreedomRoads, LLC. CAMPING globe and the CAMPING globe Logo design are signed up trademarks of CWI, LLC. and used with approval.
To receive assured trade-in value and/or assessment, lorry needs to be in very same or substantially the same problem it remained in at time of offer - Rv Trailer Repair Shops Near Me Pomona. All deals are subject to assessment. $1,000 cash money will certainly hurt in the kind of cash, check, or money order. Not legitimate in LA or OR.
Customer needs to present valid purchasers order authorized by management of contending dealer and correct documentation outlining design year, make, brand, model, alternatives, specs, shades, and vin # of marketed system. Customers order valid for 1 month from time of create up. Competing dealership will be any kind of qualified recreational vehicle dealer as recognized by the State in which the dealership operates and is not a Camping Globe RV Sales or FreedomRoads dealership.
Any kind of appropriate trade-in must be divulged and supplied for assessment at time of request. See dealer for information.
Trailer Floor Repair Pomona, CA
Your recreational vehicle or camper is even more than just a vehicleit's your home on wheels. Maintaining it in leading condition is vital for security, comfort, and efficiency. Our group specializes in motorhome repair service and recreational vehicle upkeep, supplying comprehensive solutions to maintain your Class A, B, or C recreational vehicle in peak problem.
OCRV Center
Address: 23281 La Palma Ave Yorba Linda, CA 92887Phone: (714) 909-1444
Email: [email protected]
OCRV Center
Repairing circuitry concerns, battery substitutes, and generator service. RV tire placing, balancing, and alignments for a secure adventure. From tiny campers to large motorhomes, we take care of all RV repair work with expert care.
Cargo Trailer Repair Pomona, CATrailer Floor Repair Pomona, CA
Rv Trailer Repair Near Me Pomona, CA
Rv Trailer Service Near Me Pomona, CA
Rv Trailer Repair Shop Pomona, CA
Travel Trailer Repairs Pomona, CA
Fifth Wheel Service Pomona, CA
Camper Trailer Service Pomona, CA
Travel Trailer Window Replacement Pomona, CA
Camping Trailer Repair Near Me Pomona, CA
Rv Travel Trailer Repair Near Me Pomona, CA
Trailer Floor Repair Pomona, CA
Trailer Roof Repair Pomona, CA
Travel Trailer Siding Repair Pomona, CA
Camping Trailer Repair Near Me Pomona, CA
Fifth Wheel Repair Near Me Pomona, CA
5th Wheel Repair Near Me Pomona, CA
Camper Trailer Service Pomona, CA
Camping Trailer Repair Near Me Pomona, CA
Travel Trailer Furniture Pomona, CA
Trailer Roof Repair Pomona, CA
5th Wheel Repair Near Me Pomona, CA
5th Wheel Repair Near Me Pomona, CA
Camping Trailer Repair Near Me Pomona, CA
Rv Trailer Repair Shop Pomona, CA
Travel Trailer Furniture Pomona, CA
Camper Trailer Service Pomona, CA
Travel Trailer Roof Replacement Pomona, CA
Horse Trailer Repairs Pomona, CA
Trailer Awning Replacement Pomona, CA
Rv Trailer Service Near Me Pomona, CA
Trailer Awning Replacement Pomona, CA
Horse Trailer Repair Near Me Pomona, CA
Rv Trailer Repair Shops Near Me Pomona, CA
Travel Trailer Awning Replacement Pomona, CA
Travel Trailer Roof Replacement Pomona, CA
Rv Trailer Repair Shops Near Me Pomona, CA
Travel Trailer Floor Repair Pomona, CA
Rv Travel Trailer Repair Near Me Pomona, CA
Trailer Window Replacement Pomona, CA
Cargo Trailer Repair Pomona, CA
Horse Trailer Repairs Pomona, CA
Camper Trailer Service Pomona, CA
Travel Trailer Ceiling Repair Pomona, CA
Travel Trailer Replacement Windows Pomona, CA
Trailer Window Replacement Pomona, CA
5th Wheel Repair Near Me Pomona, CA
Rv Trailer Repair Near Me Pomona, CA
Horse Trailer Repairs Pomona, CA
Cargo Trailer Repair Pomona, CA
Travel Trailer Ceiling Repair Pomona, CA
Trailer Restoration Pomona, CA
Travel Trailer Furniture Pomona, CA
Fifth Wheel Service Pomona, CA
Travel Trailer Awning Replacement Pomona, CA
Cargo Trailer Repair Pomona, CA
Travel Trailer Window Replacement Pomona, CA
Horse Trailer Repairs Pomona, CA
Travel Trailer Roof Replacement Pomona, CA
Travel Trailer Ceiling Repair Pomona, CA
Rv Trailer Repair Shops Near Me Pomona, CA
Camper Floor Repair Near Me Pomona, CA
Travel Trailer Window Replacement Pomona, CA
Trailer Roof Repair Pomona, CA
Travel Trailer Replacement Windows Pomona, CA
Rv Trailer Repair Near Me Pomona, CA
Travel Trailer Window Replacement Pomona, CA
Travel Trailer Repairs Pomona, CA
Horse Trailer Repair Near Me Pomona, CA
Rv Trailer Service Near Me Pomona, CA
Fifth Wheel Service Pomona, CA
Travel Trailer Service Pomona, CA
Horse Trailer Repairs Pomona, CA
Trailer Floor Repair Pomona, CA
Rv Trailer Repair Shop Pomona, CA
Camper Trailer Service Pomona, CA
Trailer Windows Replacement Pomona, CA
Travel Trailer Repairs Pomona, CA
Finding A Seo Firm Pomona, CA
In My Area Seo Expert Pomona, CA
OCRV Center
Table of Contents
- – Fifth Wheel Service Pomona, CA
- – OCRV Center
- – 5th Wheel Repair Near Me Pomona, CA
- – Travel Trailer Ceiling Repair Pomona, CA
- – Cargo Trailer Repair Pomona, CA
- – Travel Trailer Replacement Windows Pomona, CA
- – Rv Trailer Service Near Me Pomona, CA
- – Trailer Floor Repair Pomona, CA
- – Rv Trailer Service Near Me Pomona, CA
- – Travel Trailer Ceiling Repair Pomona, CA
- – Fifth Wheel Service Pomona, CA
- – Travel Trailer Roof Replacement Pomona, CA
- – Horse Trailer Repair Near Me Pomona, CA
- – Travel Trailer Furniture Pomona, CA
- – Fifth Wheel Service Pomona, CA
- – Trailer Floor Repair Pomona, CA
- – OCRV Center
Latest Posts
Camping Trailer Repair Near Me Orange County
Van Repair Shop Near Me Pomona
Chino Rv Dinette Booth
More
Latest Posts
Camping Trailer Repair Near Me Orange County
Van Repair Shop Near Me Pomona
Chino Rv Dinette Booth