All Categories
Featured
Table of Contents
- – Camper Service Center La Habra, CA
- – OCRV Center
- – Camper Trailer Repair La Habra, CA
- – Rv Camper Repair La Habra, CA
- – Camping Repair Near Me La Habra, CA
- – Rv Camper Repair La Habra, CA
- – Rv Camper Repair Near Me La Habra, CA
- – Camper Awning Replacement La Habra, CA
- – Camper Roof Repair La Habra, CA
- – Pop Up Camper Canvas Repair La Habra, CA
- – Camper Roof Repair La Habra, CA
- – Pop Up Camper Repair La Habra, CA
- – Camper Roof Repair Near Me La Habra, CA
- – OCRV Center
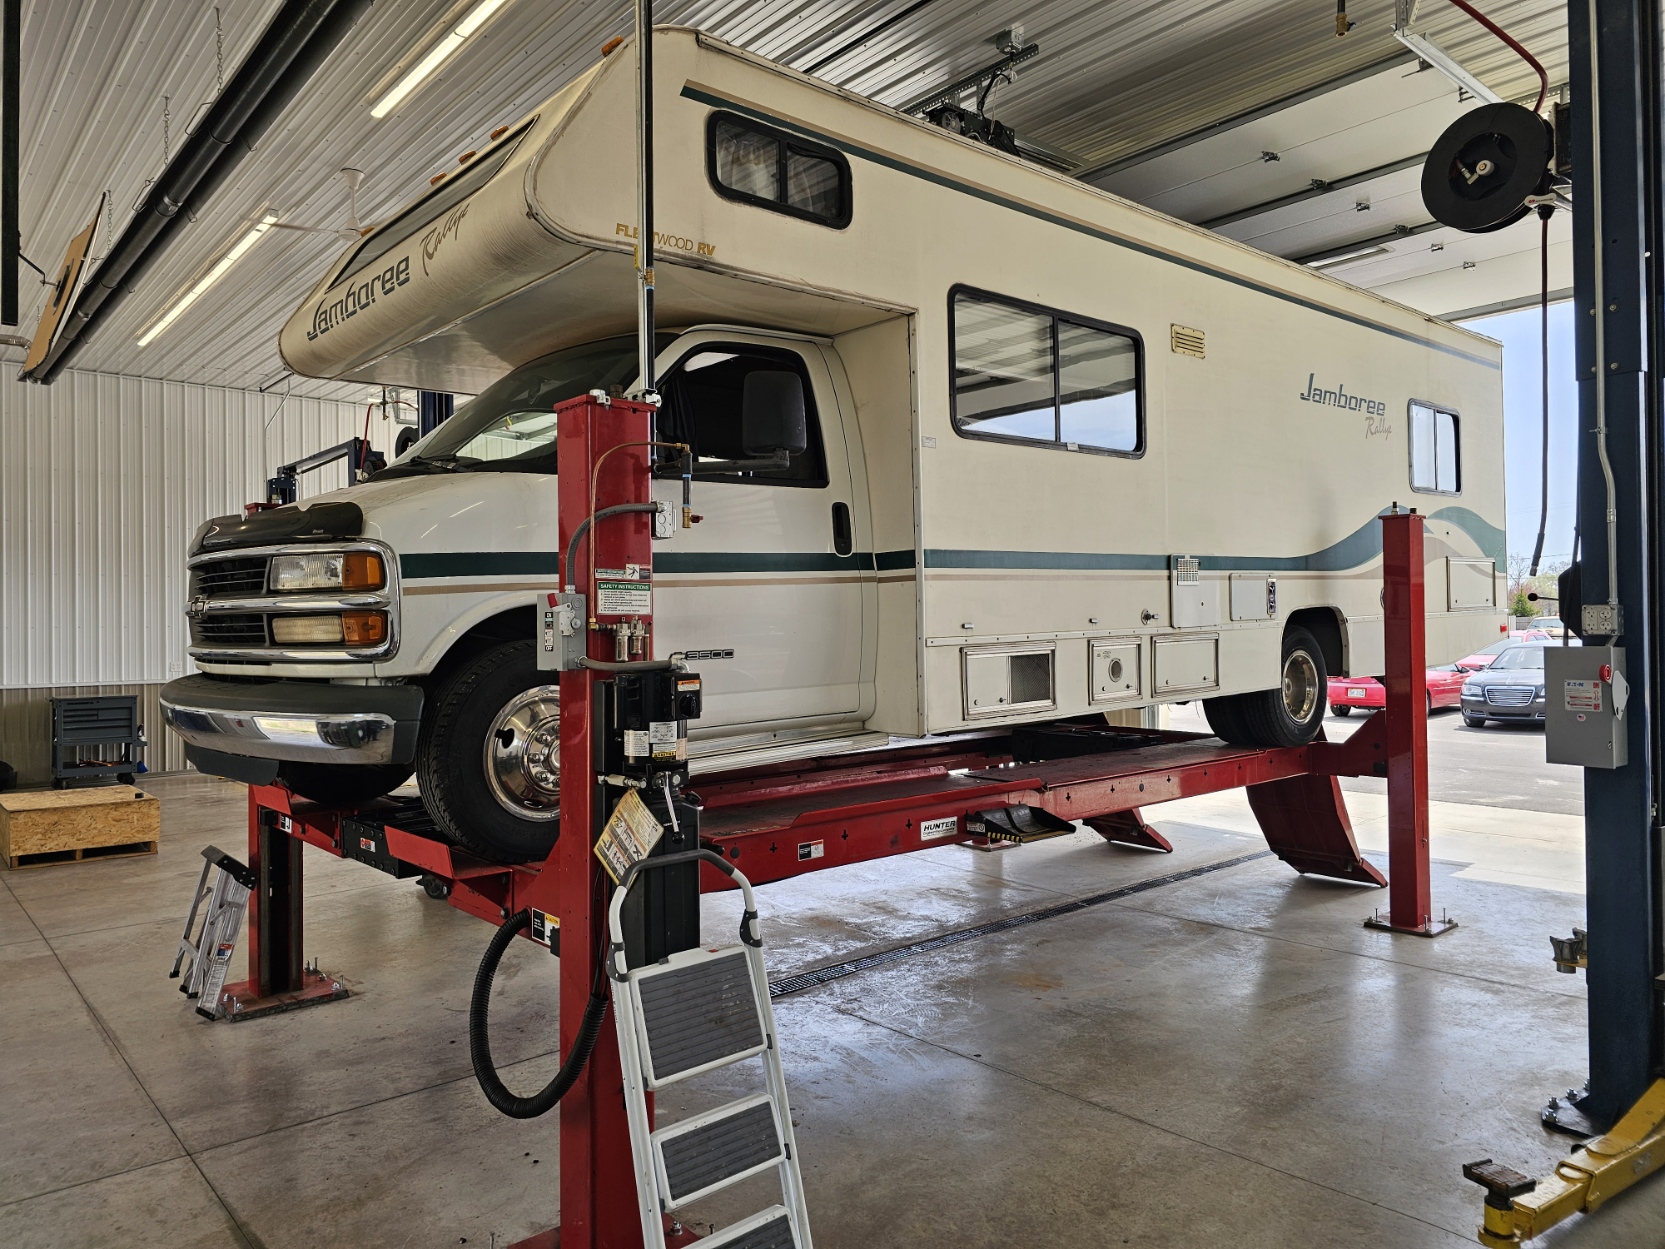
Camper Service Center La Habra, CA
Our commitment to our consumers, and our lines of product, reflect simply that. From the moment we started supplying to the RV globe, we had the goal of carrying the most effective in top notch recreational vehicle and outdoor camping items. The high demand from our customers has driven us to continuously increase our product and supply a few of the ideal product rate factors in the market.
We recognize that comfort, durability, style, and ease of setup are paramount to the aftermarket customer. Attempting to browse the aftermarket globe in Motor home parts can be somewhat of a problem.
Camper Trailer Repair La Habra, CA
All our furniture ships cost-free, and oftentimes will certainly ship on the very same day you purchase it from our storehouse. Our furniture also is available in a variety of colors to fit your specific design and the appearance of your RV. Below at RecPro, we understand that when you require your recreational vehicle item, you need it on your schedule.
We want you to get your thing when you want it. If for some reason we do not have what you're trying to find, we take unique orders for your comfort. We don't stop there. What happens if you need a thing that is off catalog? We provide tailor-made blinds and luggage doors due to the fact that we recognize that your rig is a sign of your individuality and design.
Rv Camper Repair La Habra, CA
If you have inquiries concerning a product, or want modification, contact our handy customer support department. If you buy an item and it isn't compatible with your recreational vehicle or what you visualized, we provide a money-back guarantee. There is no threat when you get with RecPro. We are a consumer solution onward firm below at RecPro.
We provide trailer fender skirts, motor home rubber roofing, water tanks, cooling units, fire places, furnaces and microwaves. When we claim one-stop-shop, we imply it. We made certain that our choices were very easy installment items that, while they can be set up by an expert, are tasks for also the most unwinded DIY technician.
We remain to expand swiftly as a result of our high requirements in high quality and customer support. We make and market a few of the very best items worldwide for individuals with mobile homes. From the most severe people in the motor home globe, to the part-time camper, we have something for everyone.
Desire to upgrade your RV? General Services Winterization All device replacement/repair Awning replacement/repair Load Wheel Bearings Brake Work We do insurance coverage quotes and fixing work Propane Drawback job (Brake Control installment, Receiver installment, Fifth wheel/Gooseneck Setup) Please call our Service Division at (618) 254-1180 to schedule your service work.
Camping Repair Near Me La Habra, CA
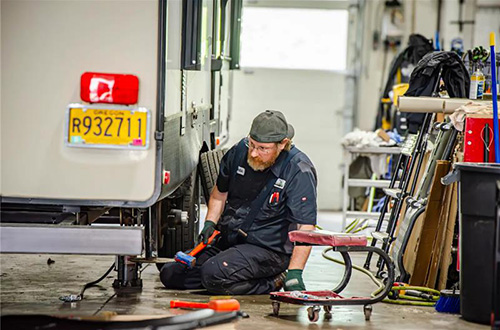
We take satisfaction in supplying top quality solution with very little disruption to your traveling strategies. When you call Mikes motor home Facility, you can trust that you're obtaining top-notch solution from experts that respect your safety and complete satisfaction. RV Repair Service Specialists Mobile Recreational Vehicle Repair Provider RV Components Available We Additionally Repair Recreational Vehicle Home Appliances Locally Owned & Operated In Service Considering That 1995 Wonderful Customer Care High Quality Work - Inexpensive Prices Offering Madera, CA & Surrounding Locations Engine and mechanical repair work Electric system troubleshooting and repair work Plumbing system repairs A/c and furnace repair work Brake and suspension repair services Generator fixings Slide-out fixings Appliance repair work (refrigerators, ranges, microwaves, etc) Water heating system repair services Roofing system repairs and upkeep Exterior and interior illumination repairs Along with our mobile repair service services, Mikes RV Facility likewise provides 24/7 roadside help.
Whether you're stranded on the side of the road or at a camping area, our group will pertain to your place to aid you out of a difficult spot (La Habra Camper Roof Repair Near Me). Our roadside assistance services are designed to get you back on the roadway quickly and safely. From blowouts and dead batteries to sustain delivery and lockout aid, we have actually obtained you covered
Choosing the right provider for your motor home repair service and roadside aid requires is necessary. Below's why Mikes motor home Center is the most effective selection in the Madera, CA area: Our group contains very trained and experienced professionals who are experienced concerning all aspects of RV repair service and maintenance. We involve you, saving you the trouble of hauling your motor home to a service center.
Rv Camper Repair La Habra, CA
Regardless of the moment of day or night, we're available to assist you with any kind of RV-related issues you might come across. From minor repair services to significant overhauls, we provide a full series of solutions to keep your RV in leading condition. Our leading concern is your fulfillment. We strive to offer exceptional solution and ensure that you're happy with the outcomes.
We focus on doing repair services, upkeep, minor paint and body repairs and maintenance of Lance Camper & Traveling Trailers units. For many people, their Lance Camper or Trailer will be the 2nd largest acquisition of their life besides their home, and for much of our customers, it is their home.
Rv Camper Repair Near Me La Habra, CA
Having your Lance Camper or Trailer repair work, services and maintenance preserved regularly can mean the distinction in between a RV adventure and a motor home blunder. What sets our fixing shop apart from a dealer is we are not here to offer you a brand-new one, we are right here to fix and maintain what you have.
We additionally share Lance Camper & Trailer that are on our lot. If you're not able to bring your system in for maintenance or repair services or if you're looking to deal with an upgrade as a DIY task we've obtained you covered! See our for whatever you'll require, consisting of standard components, accessories, and devices to assist you preserve your Recreational vehicle.
Camper Awning Replacement La Habra, CA
We specialize in quick, expert fixings and installments. We RVs; parts and solution are our specialized!
Generators are at the heart of a sustainable and comfy RV experience. We're below to encourage, help, and provide repair services for every one of your RV generator needs. As a Licensed Cummins Onan generator dealership, we can walk you with the finest and most current, despite whether you have an interest in solar energy or dream to select from a selection of diesel, gas, and liquid gas generators available.
Camper Roof Repair La Habra, CA
is more than just a recreational vehicle repair service shop; we're a three-way hazard in the industry. Our slave's heart drives us to go above and beyond for our customers. Second, our group has substantial RV repair work and trailer upkeep expertise and competence. Third, we concentrate on finding and installing the best devices for your vehicle, guaranteeing you're well-appointed for your next experience.
Device Inspections & ServiceWe can function on a wide variety of motor home devices and systems such as ac system, water heating systems, awnings, furnaces, stoves and arrays, fridges, and water supply. Roof Covering Inspections & Maintenance We can check for and repair splits, spaces, and splits in the roofing system along with deal with damaged vent covers and broke seals.
Pop Up Camper Canvas Repair La Habra, CA
Every single time you travel you shouldIt is vital to inspect your motor home before and after each journey, whether you bring it in for a check up or do it on your own (La Habra Camper Roof Repair Near Me). Here are some things you must be inspecting each time you hit the road: Headlights/brake lights Tires and lugs Connection to tow vehicle Under the hood (motorhomes) Semi-annually you shouldRV's are constructed of components that begin to break in time
The only method to hinder a malfunction when driving is to maintain your motor home kept, with top quality substitute components and professional technicians. Do not run the risk of a detour on your next trip; bring your motorhome to Wade's Body & Framework Shop, Inc. for any and all of your repair and maintenance demands.
As long as basic upkeep and repair work are dealt with, there must be little to no concerns at all. To increase awareness, we determined to include a list of conventional upkeep and upkeep tips for your RV/trailer here! If you have any kind of questions, just drop in the store or give us a phone call below at Wade's Body & Framework Store, Inc.
You must lube ramp door pivots with Lithium grease. Likewise, occasionally oil the ramp door expansion. Inspect the huck screws occasionally. If you find a loosened huck bolt fastener, do not tow the trailer. Call your dealership for instructions. Huck bolts are not end-user serviceable. Going out RVing is a holiday and an adventure rolled into one so prior to going out, make an appointment to have your recreational vehicle serviced.
Change your tires at the exact same time so you are conscious when they need to be changed again. Periodic assessment and maintenance of your RV and trailer tires and wheels are essential to lugging safety and security, consisting of spare tires.
Make sure connector-plug prongs and receptacles, light bulb outlets, cord interlaces, and ground connections are tidy and protected from wetness. Clean the prongs with extremely great sandpaper, being mindful not to damage the contact location.
Camper Roof Repair La Habra, CA
The connection point might need periodic lubrication to allow free activity of the coupler to the drawback sphere. Our job at Wade's Body & Framework Shop, Inc. in Waynesburg is to aid you travel safely and these RV ideas we really feel are a good means to aid you with your RV ownership.
Going gradually will additionally assist when you face negative weather condition. High winds will certainly impact your motorhome or RV greater than it will certainly a car. Maintain a solid grasp on your guiding wheel and you ought to be okay. For rainfall or snow, you must reduce your rate. A vehicle like a motorhome is less susceptible to skidding than a cars and truck as a result of its reduced center of mass, but at the very same time, it is much tougher to manage if it enters into a skid.
A panel, typically underneath the slide out, provides you complete accessibility to the storage tank. Your instructor might be equipped with a 60-lb./ 14-gallon container. One pound of lp creates 36 cubic feet of gas. You can expect to use a couple of gallons of LP a week in cozy climate and even more if it's chilly and the furnace is operating.
Pop Up Camper Repair La Habra, CA
When wintertime occurs and camping season mores than, what do you do with the motor home? Just park it? Not so fast. You have some tasks to do if you want to utilize your recreational vehicle once again in the spring. Revealing your camper to freezing weather condition without prep work can harm a variety of systems, such as water lines, tanks, and water heating systems.
We recommend you adhere to these treatments for keeping your RV or that you bring it to Wade's Body & Structure Shop, Inc. in Waynesburg for winterizing. Begin by eliminating all food and beverages.
Drain extensively all water storage tanks, holding tanks, lines, and pumps to prevent damages to the RV's water system. Don't drain pipes the containers onto your front lawn.
Right Here at Tom Schaeffer's we understand exactly how useful your trip time is, so we offer fast turn-around times in our Pennsylvania Recreational vehicle service department. Tom Schaeffer's employs Master Qualified Specialists, Recreational Vehicle Certified Technicians and factory-trained specialists.
Camper Roof Repair Near Me La Habra, CA
Suppliers neighborhood to me do not have as excellent a selection on offered systems. Fixing division is great, and they have a rather huge paint cubicle which is not common (for RV paint fixings)." Thomas "We needed assistance on our journey out to Colorado and drew in randomly.
Really gracious with terrific client service. Assisted us obtain back when traveling safely. Thank you." Melissa M. "Good individuals. Friendly. A massive whole lot and well-stocked shop, also. Bought our 5th Wheel below and still drive 90 minutes each method for solution and repair services: that says something regarding their solution, do not you assume?" Monty M.
Locally possessed and ran in Missouri, Midwest RV Facility has actually been making desires come real for over 15 years. We are a full-line motor home Dealership offering recreational vehicle Sales, RV Money & Guarantee, Recreational Vehicle Service, RV Hitching and RV Components & Accessories all under one roofing. That makes Midwest motor home Center St.
Whether you remain in search of a home on wheels or a weekend get-away camper, we make sure to have what you are searching for with virtually 10 acres of brand-new Recreational vehicles available in South St. Louis County with devices from motor home manufacturers like Coachmen, Fleetwood, Jayco and Keystone.
OCRV Center
Address: 23281 La Palma Ave Yorba Linda, CA 92887Phone: (714) 909-1444
Email: [email protected]
OCRV Center
Our group is committed to going above and beyond and running the company based upon honesty, honesty, ahead of time rates, consumer satisfaction and priority customer support. Below at Midwest Recreational Vehicle Center, we are dedicated to the high quality of your outdoor camping experience. La Habra Camper Roof Repair Near Me. Our team generates the excess of over 500 years of RV experience to guarantee your full fulfillment, whatever your recreational vehicle demands may be
Camper Repair La Habra, CAPop Up Camper Canvas Repair La Habra, CA
Pop Up Camper Canvas Repair La Habra, CA
Camper Service Center La Habra, CA
Pop Up Camper Roof Replacement La Habra, CA
Camper Roof Repair Near Me La Habra, CA
Camper Trailer Service Near Me La Habra, CA
Camper Repair La Habra, CA
Camper Services La Habra, CA
Camper Trailer Repair Near Me La Habra, CA
Camping Repair Near Me La Habra, CA
Camping Repair Near Me La Habra, CA
Camper Trailer Repair La Habra, CA
Camper Service Center La Habra, CA
Camper Trailer Repair Near Me La Habra, CA
Camper Trailer Repair Near Me La Habra, CA
Rv Camper Repair Near Me La Habra, CA
Camper Trailer Repair Near Me La Habra, CA
Camper Roof Repair La Habra, CA
Camper Roof Repair Near Me La Habra, CA
Camper Repair Shop La Habra, CA
Camper Trailer Service Near Me La Habra, CA
Camper Trailer Service Near Me La Habra, CA
Camper Trailer Repair Near Me La Habra, CA
Pop Up Camper Roof Replacement La Habra, CA
Camping Repair Near Me La Habra, CA
Camper Service La Habra, CA
Pop Up Camper Roof Replacement La Habra, CA
Camper Repair La Habra, CA
Camper Repair Shop Near Me La Habra, CA
Camper Service And Repair La Habra, CA
Camper Repair Places Near Me La Habra, CA
Camper Repair Shop Near Me La Habra, CA
Camper Awning Replacement La Habra, CA
Rv Camper Repair La Habra, CA
Pop Up Camper Canvas Repair La Habra, CA
Rv Camper Repair La Habra, CA
Pop Up Camper Roof Repair La Habra, CA
Camper Repair And Service La Habra, CA
Camper Service La Habra, CA
Camper Awning Replacement La Habra, CA
Rv Camper Ac Repair La Habra, CA
Camper Repair Shops Near Me La Habra, CA
Camper Air Conditioner Repair Near Me La Habra, CA
Pop Up Camper Canvas Repair La Habra, CA
Camping Repair Near Me La Habra, CA
Rv Camper Repair La Habra, CA
Camper Awning Repair La Habra, CA
Camper Trailer Repair Near Me La Habra, CA
Camper Repair Places Near Me La Habra, CA
Pop Up Camper Roof Repair La Habra, CA
Pop Up Camper Roof Repair La Habra, CA
Pop Up Camper Repair Near Me La Habra, CA
Camper Repair Near Me La Habra, CA
Camper Repair La Habra, CA
Camper Trailer Service Near Me La Habra, CA
Camper Repair Near Me La Habra, CA
Pop Up Camper Repair Near Me La Habra, CA
Camper Repair La Habra, CA
Camper Service And Repair La Habra, CA
Camper Service Near Me La Habra, CA
Camper Service And Repair La Habra, CA
Camper Air Conditioner Repair Near Me La Habra, CA
Pop Up Camper Repair La Habra, CA
Camper Roof Replacement La Habra, CA
Camper Service Center La Habra, CA
Camper Repair Shops Near Me La Habra, CA
Camper Repair La Habra, CA
Camper Trailer Service Near Me La Habra, CA
Pop Up Camper Canvas Repair La Habra, CA
Pop Up Camper Repair La Habra, CA
Camper Repair Shop Near Me La Habra, CA
Rv Camper Ac Repair La Habra, CA
Camper Repair Shops Near Me La Habra, CA
Camper Repair And Service La Habra, CA
Pop Up Camper Repair La Habra, CA
Camper Services La Habra, CA
Camper Service Near Me La Habra, CA
Close To Seo Specialist La Habra, CA
Near Here Seo Services For Business La Habra, CA
OCRV Center
Table of Contents
- – Camper Service Center La Habra, CA
- – OCRV Center
- – Camper Trailer Repair La Habra, CA
- – Rv Camper Repair La Habra, CA
- – Camping Repair Near Me La Habra, CA
- – Rv Camper Repair La Habra, CA
- – Rv Camper Repair Near Me La Habra, CA
- – Camper Awning Replacement La Habra, CA
- – Camper Roof Repair La Habra, CA
- – Pop Up Camper Canvas Repair La Habra, CA
- – Camper Roof Repair La Habra, CA
- – Pop Up Camper Repair La Habra, CA
- – Camper Roof Repair Near Me La Habra, CA
- – OCRV Center
Latest Posts
Rancho Cucamonga Web Design Company Near Me
Local Seo Marketing Company Claremont
Leucadia Residential Plumbing Services Near Me
More
Latest Posts
Rancho Cucamonga Web Design Company Near Me
Local Seo Marketing Company Claremont
Leucadia Residential Plumbing Services Near Me