All Categories
Featured
Table of Contents
- – Rv Delamination Repair Near Me Mira Loma, CA
- – OCRV Center
- – Rv Service And Repair Near Me Mira Loma, CA
- – Rv Repair And Service Near Me Mira Loma, CA
- – Rv Refrigerator Repair Near Me Mira Loma, CA
- – Rv Service And Repair Near Me Mira Loma, CA
- – Rv Solar Installation Mira Loma, CA
- – Rv Delamination Repair Near Me Mira Loma, CA
- – Rv Plumbing Repair Near Me Mira Loma, CA
- – Motorhome Generator Repair Near Me Mira Loma...
- – Motorhome Service And Repair Near Me Mira Lo...
- – Motorhome Awning Repair Mira Loma, CA
- – Motorhome Awning Repair Mira Loma, CA
- – Rv Refrigerator Repair Near Me Mira Loma, CA
- – OCRV Center
Rv Delamination Repair Near Me Mira Loma, CA
Stick to a set up maintenance strategy and address any kind of concerns promptly to avoid complications throughout traveling. Whether you're triggering on your following experience or simply returning from one, call us at 704-257-6420 - Rv Repairs Near Me Mira Loma. Our team will be satisfied to address any kind of inquiries you might have and schedule a consultation at your benefit
Uh oh! Web page not located! Sorry the page you are looking for might have been relocated or erased. Please click anywhere to proceed browsing our website.
Rv Service And Repair Near Me Mira Loma, CA
You'll be able to obtain out on the road as quickly as feasible. Taking care of a Recreational vehicle is significantly different than taking treatment of a car.
Just how usually you service your motor home depends mostly on how often you use it. If you use your motor home or trailer frequently, it's safe to have it took a look at every 3,000 miles. If you're a seasonal RV individual, you'll intend to have actually everything looked into once every six months, particularly after the recreational vehicle has actually been saved for a lengthy duration of time.
No, Motor homes and trailers can not be serviced at any kind of solution. It's best to have your Recreational vehicle or trailer looked at by a team of experts that specialize in Motor home maintenance and repair services.
Rv Repair And Service Near Me Mira Loma, CA
We utilize the exact same high-grade parts that your motor home was initially built with to make sure that it preserves its performance and the investment you made in it. The same premium parts and devices that we use in our service center are likewise readily available for acquisition with our components department. If you intend to take the reins for a do it yourself solution project, we have you covered.
We understand that mishaps happen. If you're associated with an accident with your RV or trailer, you can depend on our specialized solution team. In our collision facility, we're equipped to care for damages and problems big and little. We even provide towing and rental automobile assistance to make the procedure as simplified as possible.
Motorhome damages is never ever fun, however search the brilliant sideyou have actually a certified motor home fixing store near Columbia that keeps an eye out for your benefits. You might not live in the location, however LF Truck Repair still intends to make you among our happy clients. As a second-generation family service, our reputation indicates every little thing to us.
Rv Refrigerator Repair Near Me Mira Loma, CA
Elder Ford specializes in local motorhome and RV repair service and service. There is a reason RV and motorhome dealers in locations like Warren, Auburn Hills, Mt. Clemens and Brighton send their customers to Senior Ford for any type of necessary repair services to their Ford framework and service. Below in Troy, we have the required on-site upkeep devices and capacity to manage recreational vehicle or motorhome repair work that a neighborhood automobile service center or a car dealership just can not take care of.
Enable us to fret about your motorhome or motor home, so you will not need to stress!.
Rv Service And Repair Near Me Mira Loma, CA
Pay as you go. Participants can pay regular monthly, quarterly and annually and avoid significant repair bills. If there is a breakdown, you can pick your fixing location. And, you choose your insurance deductible! If for any type of factor you are not pleased, you can terminate any time. **Besides the open road is everything about liberty and Great Sam covers you anywhere you roam in the united state
We strive, so you can play hard. Call us today for a tailored quote. * Costs showed based upon a typical monthly settlement quantity for current traveling trailer policies January via June 2021. Real costs might vary based on automobile year, make, model, gas mileage and insurance coverage chosen. Conventional prices will certainly be used in the prep work of any kind of quote.
However that convenience includes complexity. From engine and electric systems to plumbing, sliders, and awnings, your motor home incorporates a truck's auto mechanics with a cottage's systems. And if simply one of those stops working mid-trip, it can throw your whole journey off track. Preventative maintenance helps prevent high repair service costs, downtime in remote areas, and last-minute shuffles to find service.
Rv Solar Installation Mira Loma, CA
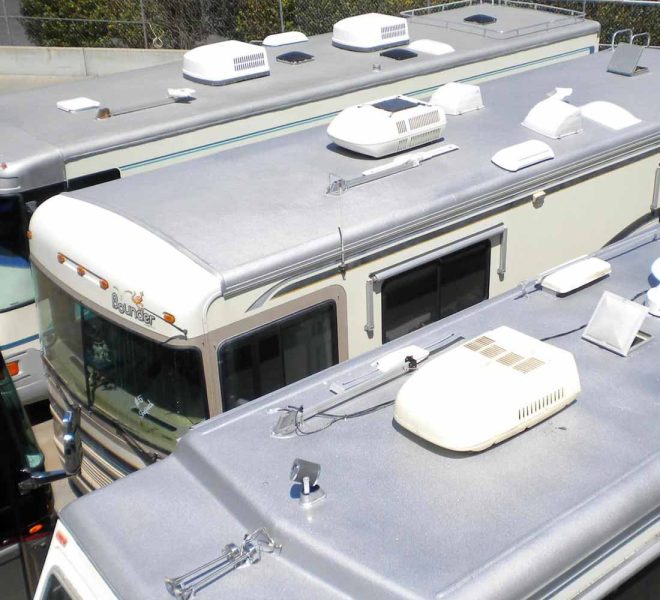
Prior to logging miles on the freeway, ensure your Motor home's powertrain is in top form. Inside lights, outlets, fridge, and A/C all depend on your Recreational vehicle's electric wellness.
Tire stress, positioning, brake pads, and suspension all lose over time. A heavy rig implies longer quiting ranges, so risk-free braking and well-maintained wheels are non-negotiable for safe summertime travel. If neglected, these convenience attributes can become headaches. Examine for correct slider procedure, roofing system sealer problems, and awning security to avoid leakages, jams, or structural damages.
Rv Delamination Repair Near Me Mira Loma, CA
Whether you're getting all set for the period or require an assessment mid-trip, we're right here to help you remain road-ready. Summer season isn't the time for surprises on the road.
Top quality, value, and technology are the core values that have actually been a component of the Gulf Stream Train way of doing organization given that it was started in Nappanee, Indiana, by Jim Shea and his children. Today Gulf Stream Coach is the industry's leading family-owned, family-operated RV supplier, incorporates 22 brand names with over 140 different versions all offered you by the most devoted and skilled team of partners in the sector.
Making use of residential-style studs, spun fiberglass insulation, and aluminum house siding for time-honored longevity and economy, in lengths from 20 ft. to 41 ft., our Main Line trailers are for dedicated RVers that recognize what they desire and identify high quality. Perfect for first-timers, value-oriented, and casual campers, combining cost-effective prices with tough yet light-weight go-anywhere building and construction.
Rv Plumbing Repair Near Me Mira Loma, CA
nuCamp has been manufacturing drop trailers and small campers since 2004, which places us in advance of the small living pattern. Now is the ideal time to upgrade from outdoor tents camping. Our little trailers, little campers, and pick-up truck campers are created to go off the grid, allowing you to explore off the beaten course and take the roadway less taken a trip.
Inspired by European impacts, our campers include a contemporary appearance that will catch everyone's eye. These little, compact campers let you bring the conveniences of home when driving without compromising on high quality. nuCamp's founder, Joe Mullet, has actually passionately grown a society of genuine take care of both our staff member and the campers we craft for our cherished clients.
Our devoted employee take terrific satisfaction in promoting integrity and pushing the borders of creative design. Every single one of our campers is thoroughly handcrafted at our modern production center in Sugarcreek, Ohio. Quality and consumer satisfaction are not simply concerns, they are the essence of our job. Our steady objective is to produce extraordinary Recreational vehicles for our exceptional consumers.
Motorhome Generator Repair Near Me Mira Loma, CA
My family members and I have been traveling for the previous 3 weeks in the RV. We have had terrible luck up till this point with our motor home. Needless to claim, lots of tows and service repair job. This business has gone above and past. They were totally recognize, sympathetic, and prepared to help till they determined what the issue was! We had our canines, children, cat, and prolonged family there with us all day.
The top quality, interaction, and cost was just what we required! Thank you to all who helped!.
Motorhome Service And Repair Near Me Mira Loma, CA
Supplies even more versatility with accessibility to a smaller sized, second car for exploring and much more living room. Gives the finest rent-and-go option and permits simplicity when it comes to establishing up camp, simply move the recreational vehicle into park.
Make certain to look us up throughout your travels up and down the eastern coastline while your having a blast outdoor camping and seeing the websites. We are easily situated simply over 30 miles west of the Chesapeake Bay and we are happy to be of solution (Rv Repairs Near Me Mira Loma). Our Solution Location in Maryland Includes: Waldorf St

Obtaining you into your all new Course A Motor Coach while making it a smooth process is always our number # 1 goal. Utilize our RV Finder tool to find the closest Motorhome Dealership that markets Fleetwood Recreational vehicles near you. Find local electric motor trainer suppliers, get in touch with details & instructions to the closet dealership.
And also, you can discover RV solution specials that can assist you save! Our specialist accredited technicians will take exceptional care of your Motor home and have you back on the roadway.
Here's what one pleased client shared:"My experience at Bayshore Vehicle Center was the most favorable, professional engagement I have had when taking care of my recreational vehicle. I acquired a brand-new 2023 Holiday Rambler Undertaking motorhome from a dealer in Florida. On our drive home to Maryland we discovered the rig was leaning to the right and the air compressor was constantly cycling.
Motorhome Awning Repair Mira Loma, CA
Utilizing the FCCC 24/7 application I called Gaffney for aid. They referred me to two different areas and I had an awful experience. I after that made a decision to try Bayshore as they were likewise identified as an Oasis dealership. First I composed a solution request online and John Colagiovanni reacted to me within an hour.
We solution and repair service most major parts consisting of LP Gas, electric and plumbing parts. We are a completely certified and insured repair service shop accepting insurance and warranty cases. Come to the Northern Virginia motor home specialist. We utilize the best quality replacement parts to obtain you back on the roadway securely and in style.
Motorhome Awning Repair Mira Loma, CA
Depend on our trained specialists to deal with any kind of internal or exterior system. Camp Ground Mobile Home Park Dealership (Pre-purchase Evaluation) On the Side of the Roadway Anywhere You May Be Within Our Service Area is another of our specializeds.
Our objective is to use the ideal RV services available at budget-friendly costs. Satisfied to introduce we now offer Recreational vehicle sales & consignment.
Rv Refrigerator Repair Near Me Mira Loma, CA
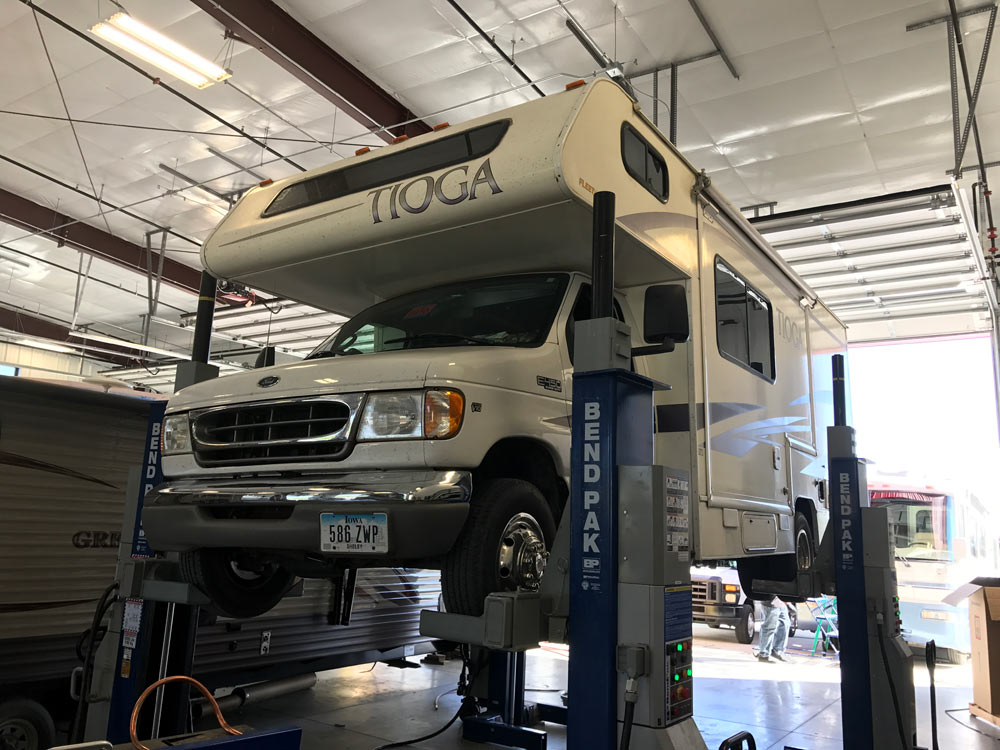
I will certainly use RV Repair service Bear once again. Very Advise! Brought my recreational vehicle in for an oil change on the train and generator. They took the motor home right in and serviced whatever while I waited as guaranteed. They likewise put in the time to examine all my fluids, tire stress, and generator mounts to make sure every little thing was secure.
OCRV Center
Address: 23281 La Palma Ave Yorba Linda, CA 92887Phone: (714) 909-1444
Email: [email protected]
OCRV Center
Prices was affordable and as quoted. I will definitely be back for maintenance in the future. Middle of winter season. Snowy conditions. The heating system in my old Toyota motorhome gave up on me. Not just did they make time within 2 days to take a look at it and detect it, ends up they had the old board in stock! Dealt with in four hours.
Rv Repair And Service Near Me Mira Loma, CARv Service And Repair Near Me Mira Loma, CA
Full Service Rv Repair Near Me Mira Loma, CA
Motorhome Refrigerator Repair Mira Loma, CA
Rv Refrigerator Repair Near Me Mira Loma, CA
Rv Mechanics Near Me Mira Loma, CA
Camper Ac Repair Near Me Mira Loma, CA
Motorhome Generator Repair Near Me Mira Loma, CA
Rv Plumbing Repair Near Me Mira Loma, CA
Rv Mechanics Near Me Mira Loma, CA
Best Rv Repair Near Me Mira Loma, CA
Rv Ceiling Repair Mira Loma, CA
Rv Repair Shops Near My Location Mira Loma, CA
Full Service Rv Repair Near Me Mira Loma, CA
Rv Solar Panel Installation Mira Loma, CA
Rv Plumbing Repair Near Me Mira Loma, CA
Rv Delamination Repair Near Me Mira Loma, CA
Motorhome Repair Shops Mira Loma, CA
Motorhome Repair Near Me Mira Loma, CA
Rv Mechanics Near Me Mira Loma, CA
Full Service Rv Repair Near Me Mira Loma, CA
Rv Repair And Service Near Me Mira Loma, CA
Motorhome Repair Shop Mira Loma, CA
Motorhome Repair Shops Mira Loma, CA
Camper Ac Repair Near Me Mira Loma, CA
Rv Delamination Repair Near Me Mira Loma, CA
Camper Ac Repair Near Me Mira Loma, CA
Motorhome Repair Shops Mira Loma, CA
Best Rv Repair Near Me Mira Loma, CA
Motorhome Repair Service Mira Loma, CA
Rv Repair And Service Near Me Mira Loma, CA
Rv Repair And Service Near Me Mira Loma, CA
Rv Floor Repair Near Me Mira Loma, CA
Rv Repair Services Near Me Mira Loma, CA
Rv Delamination Repair Near Me Mira Loma, CA
Rv Repair In My Area Mira Loma, CA
Rv Mechanics Near Me Mira Loma, CA
Rv Floor Repair Near Me Mira Loma, CA
Rv Repair In My Area Mira Loma, CA
Rv Mechanics Near Me Mira Loma, CA
Motorhome Repair Shop Mira Loma, CA
Rv Floor Repair Near Me Mira Loma, CA
Rv Solar Installation Mira Loma, CA
Motorhome Repair Shops Mira Loma, CA
Rv Ceiling Repair Mira Loma, CA
Rv Repair Centers Near Me Mira Loma, CA
Motorhome Repair Shop Mira Loma, CA
Rv Repair Services Near Me Mira Loma, CA
Motorhome Generator Repair Near Me Mira Loma, CA
Rv Repairs Near Me Mira Loma, CA
Motorhome Repair Shops Mira Loma, CA
Rv Repair Services Near Me Mira Loma, CA
Motorhome Repair Shops Mira Loma, CA
Rv Delamination Repair Near Me Mira Loma, CA
Motorhome Service And Repair Near Me Mira Loma, CA
Rv Solar Panel Installation Mira Loma, CA
Rv Repair Places Near Me Mira Loma, CA
Rv Repair Centers Near Me Mira Loma, CA
Rv Service And Repair Near Me Mira Loma, CA
Full Service Rv Repair Near Me Mira Loma, CA
Rv Repair Shops Near My Location Mira Loma, CA
Rv Service Repair Near Me Mira Loma, CA
Motorhome Awning Repair Mira Loma, CA
Rv Ceiling Repair Mira Loma, CA
Rv Solar Panel Installation Mira Loma, CA
Rv Repairs Near Me Mira Loma, CA
Rv Mechanics Near Me Mira Loma, CA
Motorhome Generator Repair Near Me Mira Loma, CA
Rv Repair Centers Near Me Mira Loma, CA
Rv Floor Repair Near Me Mira Loma, CA
Rv Repair In My Area Mira Loma, CA
Rv Floor Repair Near Me Mira Loma, CA
Rv Mechanics Near Me Mira Loma, CA
Rv Solar Panel Installation Mira Loma, CA
Rv Refrigerator Repair Near Me Mira Loma, CA
Rv Repair In My Area Mira Loma, CA
Rv Floor Repair Near Me Mira Loma, CA
Motorhome Generator Repair Near Me Mira Loma, CA
Finding A Seo Specialist Mira Loma, CA
Finding A Good Seo Firm Mira Loma, CA
OCRV Center
Table of Contents
- – Rv Delamination Repair Near Me Mira Loma, CA
- – OCRV Center
- – Rv Service And Repair Near Me Mira Loma, CA
- – Rv Repair And Service Near Me Mira Loma, CA
- – Rv Refrigerator Repair Near Me Mira Loma, CA
- – Rv Service And Repair Near Me Mira Loma, CA
- – Rv Solar Installation Mira Loma, CA
- – Rv Delamination Repair Near Me Mira Loma, CA
- – Rv Plumbing Repair Near Me Mira Loma, CA
- – Motorhome Generator Repair Near Me Mira Loma...
- – Motorhome Service And Repair Near Me Mira Lo...
- – Motorhome Awning Repair Mira Loma, CA
- – Motorhome Awning Repair Mira Loma, CA
- – Rv Refrigerator Repair Near Me Mira Loma, CA
- – OCRV Center
Latest Posts
Laguna Hills Health Insurance Plans Individuals
Health Insurance Plans For Family Stanton
Life Insurance Family Plan Aliso Viejo
More
Latest Posts
Laguna Hills Health Insurance Plans Individuals
Health Insurance Plans For Family Stanton
Life Insurance Family Plan Aliso Viejo