All Categories
Featured
Table of Contents
- – Fiberglass Roof Repair Fullerton, CA
- – OCRV Center
- – Rv Windshield Repair Fullerton, CA
- – Rv Window Repair Fullerton, CA
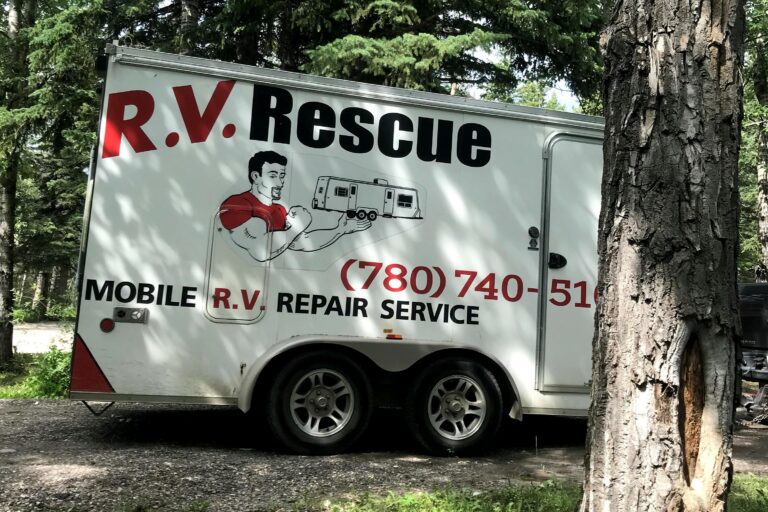
- – Rv Repair Shops Fullerton, CA
- – Dometic Refrigerator Repair Fullerton, CA
- – Rv Air Conditioning Repair Fullerton, CA
- – Rv Air Conditioning Repair Fullerton, CA
- – Rv Repair Shop Near Me Fullerton, CA
- – Rv Windshield Repair Near Me Fullerton, CA
- – OCRV Center
Fiberglass Roof Repair Fullerton, CA
Our in-store choice is tailored to satisfy all your needs, and our user-friendly on-line catalog allows you to go shopping from the comfort of your home. If there is a specific component you need that we do not presently supply, simply submit our very easy order form, and we will certainly take treatment of the rest.
provide simply that. Stay clear of the danger of harming your car by delegating the setup to our capable hands. If you choose to leave it to the professionals, routine a service appointment and let us make sure that your recreational vehicle operates perfectly. Prepare for your following journey with confidence by selecting Sun City recreational vehicle, Inc.
Call our personnel for a quote today. Don't wait 3 weeks to have your system checked out. Obtain your recreational vehicle or trailer in today and in some situations, repair work can be performed with exact same day service. With expertly educated specialists, very competent, pleasant and truthful team, you can be remainder assured that when you check out Sunlight City motor home you will not be disappointed.
See what our clients have to state about us by seeing our testimonial page or go here to to see our existing components and service specials being deal. We eagerly anticipate the opportunity to gain your organization. For us at Sunlight City Recreational Vehicle it has to do with creating clients for life.
Rv Windshield Repair Fullerton, CA
We stand by our work and assure your satisfaction.
We eagerly anticipate seeing you the next time you are requirement of sincere and quality recreational vehicle or trailer fixing or simply need components or lp. Let us gain your trust fund and reveal you why we are Arizona's biggest, most relied on and trustworthy recreational vehicle consignment facilities. To produce customers permanently - Both interior and external.
Deal with every person with integrity, honesty and respect. We thanks for your business!.
Jared, thanks a lot. I have actually been mosting likely to various RV suppliers and technicians in the valley for forty years. From currently on I am only mosting likely to utilize you. You are one of the most truthful, competent, and effort person I have ever fulfilled. Your costs were fantastic. See you quickly.
Rv Window Repair Fullerton, CA
We have actually also obtained terrific products for those that such as to traverse the summer season. See our motor home repair work shop in Phoenix today to discover several of the industry's finest cooling systems, consisting of A/C devices from name brand names like Development, Dometic, Carrier and Coleman. Residing in the Phoenix, Arizona city, seasonal hailstorm storms are a constant incident, and routine vehicles aren't the only kind of automobile influenced.
We have an incredible option of various other RV parts and accessories. Visit today to find Colorado and Zip Dee awnings, Bendix RV Brakes, Kingdome and Wineguard satellite systems, Dometic fridges, 12v to 110v converters, Delo Diesel motor Oil, Xantrex inverters and more - the listing goes on and on! For motor home repair work, see us! Our affiliates will assist you choose the best RV parts and devices for your requirements, and if we don't have what you're seeking, we can assist you track it down.
Thanks so a lot! 10/07/2022Thank you Larry's Auto Facility Inc. for getting us back when driving QUICK! They were extremely suiting, as I needed to wait at the look for the oil modification considering that Jimmy was playing a show. They were nice sufficient to fit us in and allow Motley and I hang around in the air conditioning.
Rv Repair Shops Fullerton, CA
Our service division is staffed with highly educated service technicians dedicated to making certain your motor home remains in great functioning order for many years ahead. Right Here at RV Electrical Outlet Facility, we know that going out on the roadway and enjoying our fantastic nation is your top priority, and we will certainly help keep you taking a trip in convenience and design.
That's why we keep our lines of interaction open and monitored, so you can reach us when you need us most. In the heart of Texas, the enchanting community of Conroe stands as a sanctuary for adventurers and camping lovers. For those who love the open road and the open airs, possessing a RV is a portal to memorable trips.
This is where the relevance of mobile motor home repair work shines via, using a lifeline to Conroe's campers. Ease is Key: Mobile motor home repair brings the service center to you, eliminating the demand to transfer your large and typically troublesome automobile to a distant repair service center. This is specifically beneficial for campers in Conroe, as the community's attractive landscapes are best taken pleasure in without the headache of organizing transport for a malfunctioning RV.Time-Efficiency Matters: Time invested waiting on repair work is time shed for expedition and adventure.
High quality, value, and technology are the core worths that have belonged of the Gulf Stream Train method of operating considering that it was founded in Nappanee, Indiana, by Jim Shea and his sons (Motorhome Repair Shop Near Me Fullerton). Today Gulf Stream Coach is the industry's leading family-owned, family-operated recreational vehicle maker, encompasses 22 brands with over 140 various models all brought to you by the most committed and experienced group of associates in the market
Dometic Refrigerator Repair Fullerton, CA
Utilizing residential-style studs, rotated fiberglass insulation, and light weight aluminum house siding for classic resilience and economic climate, in lengths from 20 ft. to 41 ft., our Key Line trailers are for specialized RVers that understand what they desire and identify quality. Perfect for first-timers, value-oriented, and informal campers, integrating cost-effective pricing with tough yet light-weight go-anywhere building.
From regular maintenance services to cleaning the interior, you require to be attentive about just how you care for your RV. We desire to aid make the procedure simpler at Cranberry Car Solution Facility, and we do that via our detailed RV fixing solution.
We intend to ensure that never ever happens, and we accomplish that by enlightening our clients. Here are some usual issues you'll see in your recreational vehicle and what you need to do: Also if you drive one of the most contemporary RV, your car will likely deal with water leakages. This is inevitable, as all RVs ultimately catch the aspects in some shape or kind.
Along with coming in for solution to patch up the leakage, also considering investing in a premium motor home cover, which will safeguard it from the elements when it's not in use. If your RV is having electric issues, whether a light button isn't working or the fronts lights are dark, it is essential to get to out to a certified specialist.
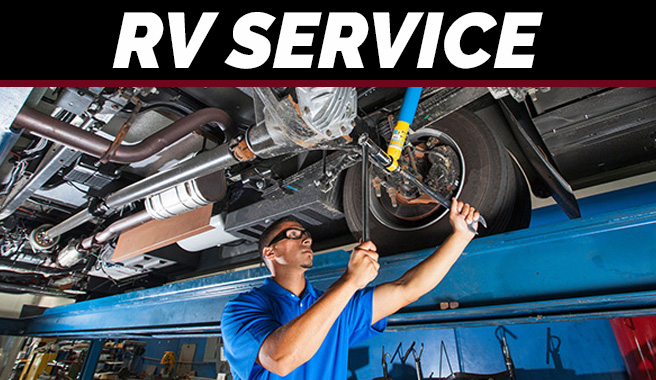
Rv Air Conditioning Repair Fullerton, CA
See dealer for information. Rates are inclusive of all available price cuts. Federal government fees, state taxes, supplier charges and exhausts screening fees as applicable will be included to abide with state car codes.
Requirements, devices, technical information, pictures and pictures are based on details readily available at time of posting and are subject to change without notice. Stock and floorplans vary by area, not all advertised suppliers offered at participating dealers.
Rv Air Conditioning Repair Fullerton, CA
May not be incorporated with any type of other offer and not applicable to prior sales. Deal(s) valid at any kind of Camping Globe Recreational Vehicle Sales or FreedomRoads supplier only. See supplier for information. 2025 FreedomRoads, LLC. CAMPING globe and the Outdoor Camping WORLD Logo are signed up hallmarks of CWI, LLC. and used with approval.
All legal rights booked. FreedomRoads LLC, its related dealerships and innovation companions are exempt for mistakes in price or errors in description of problem of a vehicle's listed devices, accessories, cost or service warranties. Any and all distinctions have to be addressed prior to the sale of this lorry. Choice to market a recreational vehicle no matter cost is exclusively identified by the selling dealership. * Best deal or $1,000 - offer needs to remain in composing and gotten from a licensed recreational vehicle dealership.
To receive ensured trade-in worth and/or evaluation, car has to be in very same or substantially the same problem it was in at time of offer. All deals are subject to examination.
Customer has to offer legitimate buyers order signed by management of completing dealership and proper paperwork describing model year, make, brand name, version, options, specifications, shades, and vin # of advertised system. Customers order legitimate for thirty day from time of create up. Competing supplier will certainly be any kind of certified motor home dealer as recognized by the State in which the dealership operates and is not a Camping Globe RV Sales or FreedomRoads dealership.
Rv Repair Shop Near Me Fullerton, CA
Any kind of appropriate trade-in has to be disclosed and offered appraisal at time of request. Not applicable to prior sales. See dealer for information. Not legitimate in The golden state. Gap where prohibited. For main Strategy motor home rebate terms and conditions, please visit .
We have the professional devices and experience to get keep your Boat or motor home in prime condition, which means even more roadway time for you (Motorhome Repair Shop Near Me Fullerton). Provide us a phone call and we'll obtain you in and out of the shop in an effective and prompt way, so you can get back to experiencing the freedom that the motor home and boating way of life provides
If you have any kind of concerns or issues concerning your boat or camper, do not hesitate to call us at ( 931) 646-4678 and we'll enjoy to help you over the phone or help you in making a consultation. Come speak to us about how to best maintain your investment and find out more about our available services! Call, visit, or call us today.
Rv Windshield Repair Near Me Fullerton, CA
To make an appointment please call among our three convenient advanced highway friendly locations or submit the e-contact type. Appliance Fixing (stove, furnace, fridge, AIR CONDITIONING) Awning Repair Work Axle Repair Work/ Maintenance Floor Fixing Roofing Repair Service Aftermarket Accessories Installment Electric Hitch/ Brake Installation Pipes Propane Body Store/ Crash Facility Therefore a lot more.
OCRV Center
Address: 23281 La Palma Ave Yorba Linda, CA 92887Phone: (714) 909-1444
Email: [email protected]
OCRV Center
In Solution we have Licensed Motor Home Professionals, Master Qualified Service Technicians, Certified Service Writers, and Qualified Solution Managers, one of which has been with Little Dealership given that 1975. Little Dealer Little Prices Motor home is an accredited participant of the Better Service Bureau with an A+ rating, the greatest available.
Rv Mechanic Near Me Fullerton, CARv Windshield Repair Fullerton, CA
Rv Windshield Repair Fullerton, CA
Norcold Rv Refrigerator Repair Fullerton, CA
Rv Air Conditioner Repair Fullerton, CA
Rv Fridge Repair Fullerton, CA
Rv Service And Repair Fullerton, CA
Rv Windshield Replacement Fullerton, CA
Rv Air Conditioning Repair Near Me Fullerton, CA
Rv Repair Shops Fullerton, CA
Rv A/C Repair Near Me Fullerton, CA
Rv Windshield Replacement Fullerton, CA
Rv Repair Shops Fullerton, CA
Rv Air Conditioning Repair Near Me Fullerton, CA
Rv Mechanic Fullerton, CA
Rv Repair Shops Fullerton, CA
Rv Windshield Replacement Fullerton, CA
Emergency Rv Repair Near Me Fullerton, CA
Rv Repair Shop Near Me Fullerton, CA
Rv Mechanic Near Me Fullerton, CA
Rv Air Conditioning Repair Near Me Fullerton, CA
Rv Fridge Repair Fullerton, CA
Rv Air Conditioner Repair Fullerton, CA
Fiberglass Roof Repair Fullerton, CA
Rv Window Repair Fullerton, CA
Rv Air Conditioner Repair Near Me Fullerton, CA
Dometic Refrigerator Repair Fullerton, CA
Onan Generator Repair Fullerton, CA
Motorhome Air Conditioner Repair Fullerton, CA
Motorhome Repair Shop Near Me Fullerton, CA
Rv A/C Repair Near Me Fullerton, CA
Motorhome Air Conditioner Repair Fullerton, CA
Rv Repair Shops Fullerton, CA
Rv Air Conditioner Repair Near Me Fullerton, CA
Motorhome Generator Repair Fullerton, CA
Norcold Refrigerator Repair Fullerton, CA
Motorhome Repair Shop Near Me Fullerton, CA
Rv Mechanic Near Me Fullerton, CA
Rv Air Conditioning Repair Near Me Fullerton, CA
Rv Air Conditioning Repair Near Me Fullerton, CA
Rv Service And Repair Fullerton, CA
Rv Fridge Repair Fullerton, CA
Rv Engine Repair Near Me Fullerton, CA
Rv Air Conditioning Repair Near Me Fullerton, CA
Rv Air Conditioner Repair Fullerton, CA
Norcold Refrigerator Repair Fullerton, CA
Fiberglass Roof Repair Fullerton, CA
Rv Air Conditioning Repair Near Me Fullerton, CA
Rv Window Repair Near Me Fullerton, CA
Rv Mechanic Near Me Fullerton, CA
Dometic Refrigerator Repair Fullerton, CA
Rv Air Conditioner Repair Near Me Fullerton, CA
Rv Windshield Repair Near Me Fullerton, CA
Motorhome Repair Shop Near Me Fullerton, CA
Motorhome Air Conditioner Repair Fullerton, CA
Rv Service And Repair Fullerton, CA
Rv Air Conditioning Repair Near Me Fullerton, CA
Motorhome Air Conditioner Repair Fullerton, CA
Norcold Repair Fullerton, CA
Dometic Refrigerator Repair Fullerton, CA
Dometic Refrigerator Repair Fullerton, CA
Rv Windshield Repair Near Me Fullerton, CA
Norcold Rv Refrigerator Repair Fullerton, CA
Fiberglass Roof Repair Fullerton, CA
Emergency Rv Repair Near Me Fullerton, CA
Fiberglass Roof Repair Fullerton, CA
Rv Air Conditioning Repair Near Me Fullerton, CA
Rv Repair Shops Near Me Fullerton, CA
Rv Engine Repair Near Me Fullerton, CA
Norcold Repair Fullerton, CA
Rv Service And Repair Fullerton, CA
Onan Generator Repair Fullerton, CA
Norcold Repair Fullerton, CA
Rv Mechanic Fullerton, CA
Motorhome Air Conditioner Repair Fullerton, CA
Rv Mechanic Near Me Fullerton, CA
Rv Repair Shop Near Me Fullerton, CA
Onan Generator Repair Fullerton, CA
Find A Good Local Seo Agency Fullerton, CA
Find A Seo Firm Fullerton, CA
OCRV Center
Table of Contents
- – Fiberglass Roof Repair Fullerton, CA
- – OCRV Center
- – Rv Windshield Repair Fullerton, CA
- – Rv Window Repair Fullerton, CA
- – Rv Repair Shops Fullerton, CA
- – Dometic Refrigerator Repair Fullerton, CA
- – Rv Air Conditioning Repair Fullerton, CA
- – Rv Air Conditioning Repair Fullerton, CA
- – Rv Repair Shop Near Me Fullerton, CA
- – Rv Windshield Repair Near Me Fullerton, CA
- – OCRV Center
Latest Posts
Eye Insurance For Seniors Aliso Viejo
Mission Viejo Best Partd Insurance Company For Seniors
Hood Filter Cleaning Studio City
More
Latest Posts
Eye Insurance For Seniors Aliso Viejo
Mission Viejo Best Partd Insurance Company For Seniors
Hood Filter Cleaning Studio City