All Categories
Featured
Table of Contents
- – Rubber Roof For Camper Diamond Bar, CA
- – OCRV Center
- – Rv Roof Maintenance Diamond Bar, CA
- – Rv Roof Maintenance Diamond Bar, CA
- – Rv Rubber Roof Maintenance Diamond Bar, CA
- – Rv Roof Repair Near Me Diamond Bar, CA
- – Rv Roof Repair Fiberglass Diamond Bar, CA
- – Rv Roof Repair Fiberglass Diamond Bar, CA
- – Replace Rv Roof Diamond Bar, CA
- – Rubber Roofing For Rv Diamond Bar, CA
- – Rv Rubber Roof Replacement Cost Diamond Bar, CA
- – Repair Rv Roof Leak Diamond Bar, CA
- – Rv Roof Replacement Diamond Bar, CA
- – Resealing Rv Roof Diamond Bar, CA
- – OCRV Center
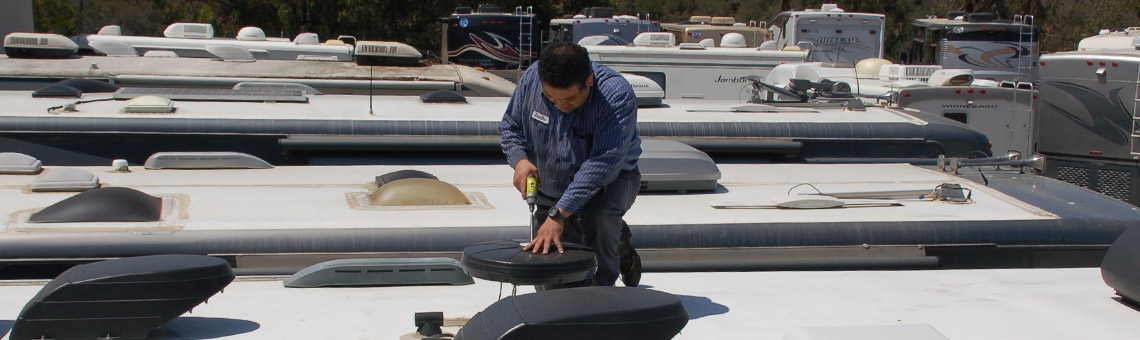
Rubber Roof For Camper Diamond Bar, CA
Clean it dry and then permit the surface to dry in the sun before using the tape per the directions. When you apply the tape, make sure to push each piece down totally, getting rid of any type of air bubbles and forcing the tape down right to the surface area in any kind of low spots.
The life-span of RV roofing systems varies commonly depending upon high quality, material, and the level of maintenance they have actually received. Ten to twenty years is a practical price quote for the whole life expectancy of a roofing system. If you believe you may require a new roofing, I recommend obtaining it evaluated and valued by a professional prior to attempting to deal with large-scale leakages by yourself.
Rv Roof Maintenance Diamond Bar, CA
And afterwards all of your time, initiative, and costs might be squandered if it's time for a new roof covering. Roofing system leakages are just one of the great typical denominators of recreational vehicle life. Every motor home, from the snazziest course A to one of the most economical and utilitarian traveling trailer, will leak at some point.
In that case, you might desire to take an appearance at these associated overviews: Our responses to regularly asked concerns regarding repairing RV roof covering leaks: Don't postpone. Leaks only get even worse and extra pricey to fix over time.
It depends on the sealant you utilize. Examine the guidelines on the sealant of your choice to validate.
Rv Roof Maintenance Diamond Bar, CA
Some RVers like them, while others advise against them. I've made use of Flex Seal items for fast, momentary repairs to our motor home's walls, and they functioned well. My only grievance is that they are difficult to eliminate. It depends upon your plan terms and what caused the roof covering leak. If the leak was created by an unexpected and unexpected occasion, such as a tree limb dropping during a storm, I would anticipate that the majority of insurance coverage would certainly cover it.
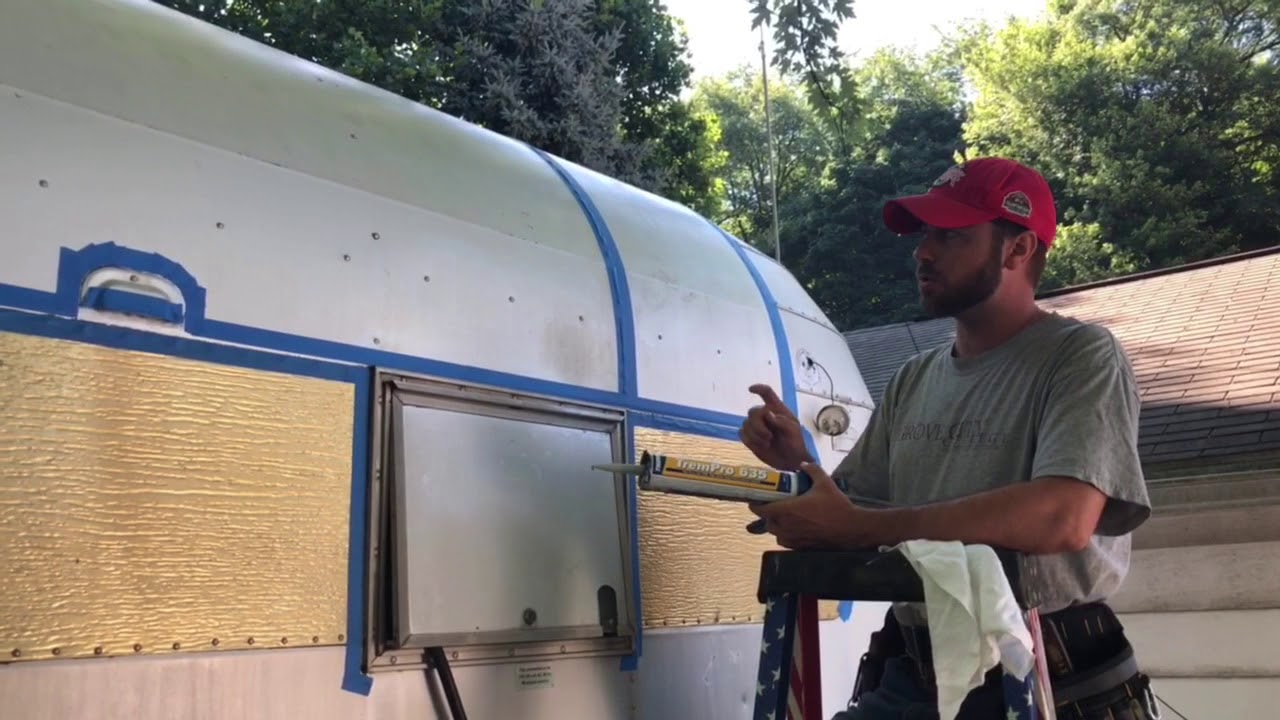
Below are some photos of a job I did to repair roofing rot on my fifth wheel camper. I selected to use this method because I might do it myself with my very own resources and abilities. Or else, a lot of hardware, including the ladder and roof covering shelf, the endcap and the filon external wall surface would certainly have had to be torn apart.
I used products from The Rot Medical professional. They were really valuable in discussing my options and in explaining the techniques to utilized their items.
Brian N. 1. I made use of a box blade to reduce the rubber roofing system in the edge. The leak was simply above the pencil where the trim molding meets the end-cap. It possibly leaked from the time the unit was brand-new, as the roofing system was extremely soft in this edge, and we have actually been in drought conditions for 2 years.
Rv Rubber Roof Maintenance Diamond Bar, CA
Folding back the rubber exposed the rotten location. I cut an item of plywood like a problem to match the form of the hole I made in the roof covering.
Below's the sprayer I made use of to use the CPES * from The Rot Physician. With its 18 steel "wand" I could probe into the 2 area in between the roofing system and the ceiling.
6. Here's the finished roofing system sealed up with Eternabond tape. I ran a strip of Eternabond completely throughout the camper where the roofing system satisfies the endcap. Any concerns of a leakage right here are a thing of the past. 7. I likewise had rot in the wall surface straight below the location on the roof covering.
I completely dried out the area for numerous days making use of the exhaust side of a small vacuum cleaner, inserting the hose in between the internal and external wall surfaces. When it was thoroughly dry I coated every little thing with CPES *, making use of the insect sprayer to permeate into or else inaccessible locations.
Rv Roof Repair Near Me Diamond Bar, CA
Note the top 3-4 of the stud was completely decomposed away. I spread out Fill-It Epoxy Filler * throughout the location. The things goes on like a thick and sticky gel, then dries to an extremely difficult product that bonds to the CPES * I had actually splashed onto the timber.
Here's the finished product. Feel complimentary to contact us if you need assistance with which items to make use of.
In this guide, we'll discover the costs, benefits, and choices for sealing and fixing your RV roofing system, helping you make the very best decision for your vehicle. While some signs that your RV roof covering is damaged or dripping are obvious, such as water streaming in during a rainstorm, other indicators of damage may not be as easily noticeable.
Rv Roof Repair Fiberglass Diamond Bar, CA
If the architectural integrity is still audio, sealing and strengthening it with Fluid Rubber items might be the smarter, a lot more cost-effective service. When you know your motor home's roof type, you ought to think about the cost of replacing it. The expense will vary depending upon the size of the motor home, the sort of roofing, and the materials utilized.
In addition to the expense of the products, ought to additionally be thought about. If you pick to work with a for the job, after that you can anticipate to pay anywhere from for labor, relying on the dimension of the RV, the kind of roof and the intricacy of the task. If you select to do the task on your own, you can anticipate to pay only for the products and the investment of your do it yourself sweat equity.
Rv Roof Repair Fiberglass Diamond Bar, CA
Don't wait till your roofing leakages obtain worse. The price of sealing your Recreational vehicle roof covering yourself largely depends on the high quality of the sealer you select.
One application covers up to a 30' RECREATIONAL VEHICLE. Offered its very easy application and considerable coverage, the labor prices continue to be minimal, making it an appealing alternative for those looking to conserve on upkeep expenses.
The expense of a complete motor home roof covering substitute ranges from $2,500 to $10,000. Repairing areas can cost $300 to $2,000+, depending on the level of the damage. A gallon of Fluid Rubber Recreational Vehicle Roofing Finishing is, and a complete package is. Normal maintenance can extend your roof's life expectancy and save considerable prices, stopping water invasion.
Sealant gives inexpensive roof covering security, setting you back about per tube for area repairs. Total roofing elimination and substitute. $2,500 - $10,000+ (products and labor). Proactive actions aim to delay or remove the requirement for full replacement substantially. As this comparison shows, positive maintenance of your RV roof is significantly a lot more economical than managing the aftermath of damage.
Replace Rv Roof Diamond Bar, CA
There are numerous various kinds of RV roofing replacement. One of the most usual kind is a rubber roofing system. Rubber High Lightweight Inexpensive Low No Steel Really High Lightweight Expensive Low Yes Fiberglass High Heavy Modest Reduced Yes Polymer Moderate Extremely Light Low-cost Reduced No Each roofing system kind has advantages and downsides, so the best selection depends on your details demands.
When you use Liquid Rubber Sealant products, follow the application guidelines meticulously. Its fluid kind guarantees complete insurance coverage of the whole roof.
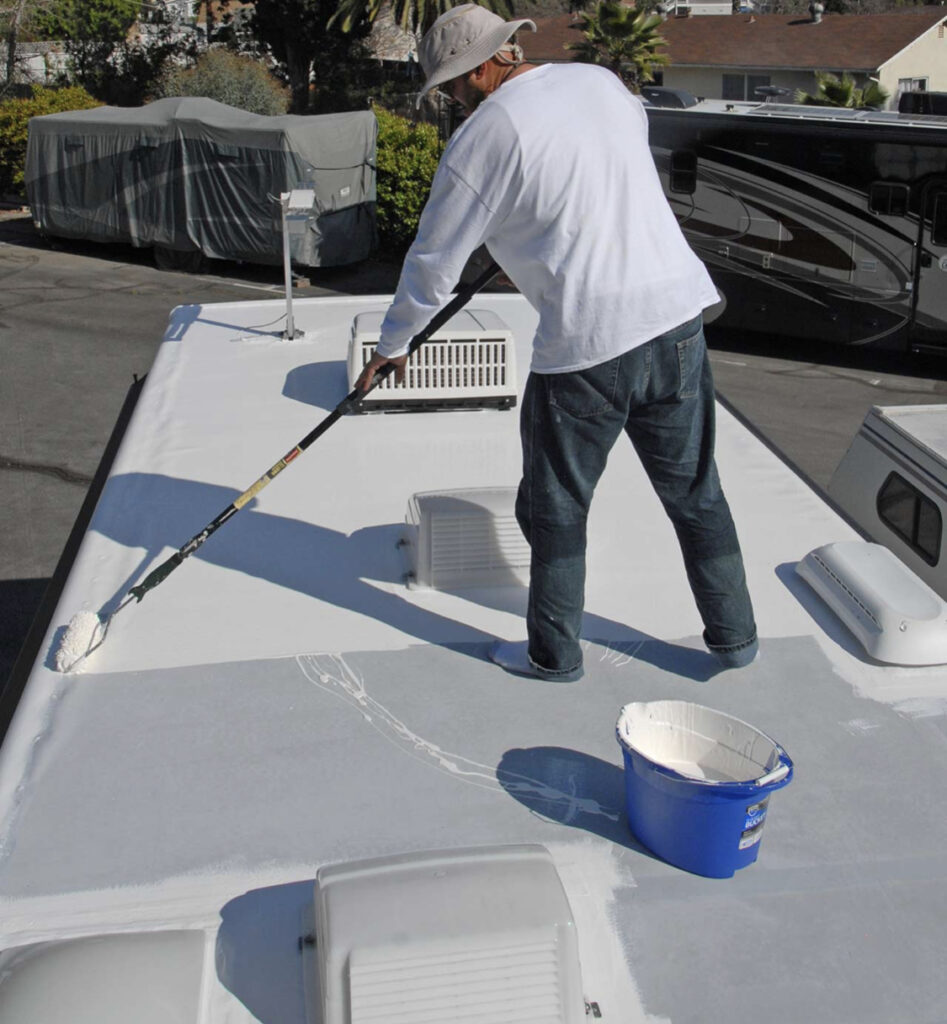
There are numerous reasons to regularly recoat your recreational vehicle roofing, sealing it versus water damages, sun, wind, and use and tear. Like any kind of electric motor vehicle, motor home roofs are built to withstand difficult weather condition, from snow to hail to a deluge. Nonetheless, the roof product can still wear with time - Best Rv Roof Repair Diamond Bar.
Rubber Roofing For Rv Diamond Bar, CA
Using Fluid Rubber RV roofing system products provides you self-confidence that you use the ideal options with the greatest track record. Resealing your motor home roofing is a convenient do it yourself job if you take it detailed. Here's a simplified overview:: Check your roof for cracks, old sealer, and damage. Tidy the whole roof surface area utilizing a RV roofing cleaner and a scrub brush.
: Meticulously remove any kind of falling short or cracked sealer around vents, skylights, and seams using a plastic scraper or specialized sealant elimination device. Be careful not to damage the roof covering material.: Using a self-leveling sealer (specifically created for motor home roof coverings), use a charitable bead along all joints, around vents, skylights, and any other roof infiltrations.
: If you have cracks or damage, take into consideration making use of RV roofing repair tape or a fluid rubber covering, following the product instructions carefully.: Once the sealer has healed (check item guidelines for healing time), inspect the whole roofing to make certain all areas are effectively sealed.: Constantly get in touch with the details directions for your sealer and repair service products.
Even small leakages can create:: Rotting wood, weakening of the roof covering framework, and damage to walls and ceilings.: This creates undesirable living problems and damages the motor home's interior.: Minimizing the performance of your motor home's insulation.: Addressing water damages is dramatically more costly than preventative upkeep like routine examinations and resealing.
Rv Rubber Roof Replacement Cost Diamond Bar, CA
To identify whether your recreational vehicle roof is constructed from EPDM or TPO, follow these steps:: Locate a roofing system air vent on your RV.: Unscrew and remove the trim ring to subject a section of the roof covering material.: Ideally, eliminate a staple from the roof product and examine both sides: If one side is white or dove gray with a black support, it is most likely EPDM.
The key difference in between RV roof covering sealant and layer is their objective and application.: This is normally utilized to load spaces, joints, and splits in the roofing product. It provides a water resistant barrier to stop leaks and is frequently applied in details locations, such as around vents, joints, and various other infiltrations.
: This is a safety layer that covers the entire roofing system surface. Coatings are usually related to improve UV resistance, reflectivity, and general roofing system toughness. They can assist prolong the life of the roof covering material by providing an extra barrier versus weather components. Both items are necessary for preserving a RV roof yet serve distinct features, guaranteeing its longevity and performance.
Repair Rv Roof Leak Diamond Bar, CA
CLEAN, CLEAN CLEAN the roofing system prior to using the finish. Did I mention Cleaning the roofing? Excellent Good luck.
CLEAN, CLEAN CLEAN the roof before applying the layer. Did I discuss Cleaning the roof? Great Good luck.
In this article, we desire to share with you how to DIY Recreational vehicle roof repair. Understanding how to DIY a whole lot of the points that can break or mess up will conserve you not just a whole lot of cash on Motor home repair work however might likewise conserve you a lot of potential time in the shop!
I might receive a small payment when you buy using my link. Review our Please Note Policy for even more info. We try to intend our routes thoroughly to stay clear of low-hanging items over the road. Often, however, we discover ourselves in unexpected circumstances. This is exactly how we ended up with a couple of small splits on the roof of our recreational vehicle.
Rv Roof Replacement Diamond Bar, CA
We assumed we were clear of the branches, but we ended up catching a few of them on the far left side of the roofing system. There were an overall of 4-5 tiny holes in the side of the roof. We didn't examine the roof because we really did not think we strike anything.
One of the tears in our motor home roof covering A few weeks later, we endured a serious electrical storm and a great deal of rainfall. Throughout the storm, we discovered that we had a percentage of water leaking via among the light fixtures in the washroom. The good news is, we did not finish up with any kind of long-term water damages.
He covered it as finest he could with sturdy gorilla tape and after that ordered the products needed to do a recreational vehicle roof repair work. The EPDM rubber roof material that most Recreational vehicles come with is usually pretty hard regarding roof covering products go (Best Rv Roof Repair Diamond Bar). Rubber roof coverings last for many years, but they do tear if captured hard enough
In our situation, this suggested removing the gorilla tape that we had made use of as a short-term repair while we waited on the materials we bought to get here. You'll desire to clean the location around the tear that you will certainly be covering well. This permits the spot to appropriately adhere and will certainly protect against future leakages.
Resealing Rv Roof Diamond Bar, CA
OCRV Center
Address: 23281 La Palma Ave Yorba Linda, CA 92887Phone: (714) 909-1444
Email: [email protected]
OCRV Center
To cleanse the roofing system, utilize massaging alcohol and either a rag or paper towels., which is a Motor home roofing system repair work tape.
Repair Rv Roof Leak Diamond Bar, CARv Roof Replacement Diamond Bar, CA
Rv Roof Repair Service Near Me Diamond Bar, CA
Repair Rv Roof Diamond Bar, CA
Rv Fiberglass Roof Repair Diamond Bar, CA
Rubber Roofing For Campers Diamond Bar, CA
Resealing Rv Roof Diamond Bar, CA
Rv Roof Repair Near Me Diamond Bar, CA
Rv Roof Repair Near Me Diamond Bar, CA
Resealing Rv Roof Diamond Bar, CA
Rv Rubber Roof Repair Diamond Bar, CA
Rubber Roof For Camper Diamond Bar, CA
Rubber Roof Installation Diamond Bar, CA
Motorhome Roof Replacement Diamond Bar, CA
Resealing Rv Roof Diamond Bar, CA
Rubber Roofing For Campers Diamond Bar, CA
Rv Roof Leak Repair Near Me Diamond Bar, CA
Roof Repair For Rv Diamond Bar, CA
Rv Rubber Roof Replacement Cost Diamond Bar, CA
Resealing Rv Roof Diamond Bar, CA
Rv Roof Replacement Diamond Bar, CA
Rv Slide Out Roof Repair Diamond Bar, CA
Rv Roof Replacement Diamond Bar, CA
Rv Rubber Roof Maintenance Diamond Bar, CA
Rv Roof Repair Diamond Bar, CA
Best Rv Roof Repair Diamond Bar, CA
Rv Roof Repair Near Me Diamond Bar, CA
Rubber Roof Installation Diamond Bar, CA
Replace Rv Roof Diamond Bar, CA
Roof Repair For Rv Diamond Bar, CA
Rv Roof Maintenance Diamond Bar, CA
Rv Roof Maintenance Diamond Bar, CA
Rubber Roofing For Campers Diamond Bar, CA
Rv Fiberglass Roof Repair Diamond Bar, CA
Roof Repair For Rv Diamond Bar, CA
Rubber Roof For Rv Diamond Bar, CA
Rv Rubber Roof Repair Diamond Bar, CA
Rv Trailer Rubber Roof Repair Diamond Bar, CA
Motorhome Roof Replacement Diamond Bar, CA
Rv Roof Maintenance Diamond Bar, CA
Motorhome Roof Replacement Diamond Bar, CA
Resealing Rv Roof Diamond Bar, CA
Rubber Roof For Rv Diamond Bar, CA
Rv Trailer Rubber Roof Repair Diamond Bar, CA
Replace Rv Roof Diamond Bar, CA
Rv Roof Maintenance Diamond Bar, CA
Rv Roof Repair Near Me Diamond Bar, CA
Rv Rubber Roof Replacement Diamond Bar, CA
Best Rv Roof Repair Diamond Bar, CA
Class C Rv Roof Repair Diamond Bar, CA
Rv Roof Leak Repair Near Me Diamond Bar, CA
Epdm Rv Roof Repair Diamond Bar, CA
Replace Rv Roof Diamond Bar, CA
Rv Rubber Roof Maintenance Diamond Bar, CA
Rv Rubber Roof Maintenance Diamond Bar, CA
Epdm Rv Roof Repair Diamond Bar, CA
Rv Roof Repair Fiberglass Diamond Bar, CA
Rv Rubber Roof Replacement Diamond Bar, CA
Rv Roof Repair Diamond Bar, CA
Rv Rubber Roof Repair Diamond Bar, CA
Rv Roof Leak Repair Diamond Bar, CA
Rv Rubber Roof Repair Diamond Bar, CA
Rv Roof Repair Fiberglass Diamond Bar, CA
Rv Trailer Roof Repair Diamond Bar, CA
Rv Trailer Rubber Roof Repair Diamond Bar, CA
Resealing Rv Roof Diamond Bar, CA
Rubber Roofing For Rv Diamond Bar, CA
Rv Trailer Roof Repair Diamond Bar, CA
Rubber Roof For Rv Diamond Bar, CA
Rv Roof Leak Repair Diamond Bar, CA
Best Rv Roof Repair Diamond Bar, CA
Repair Rv Roof Diamond Bar, CA
Rubber Roofing For Rv Diamond Bar, CA
Rv Roof Leak Repair Diamond Bar, CA
Repair Rv Roof Leak Diamond Bar, CA
Rv Rubber Roof Repair Diamond Bar, CA
Roof Repair For Rv Diamond Bar, CA
Rv Trailer Rubber Roof Repair Diamond Bar, CA
Finding A Seo Marketing Company Diamond Bar, CA
In Seo Companies Diamond Bar, CA
OCRV Center
Table of Contents
- – Rubber Roof For Camper Diamond Bar, CA
- – OCRV Center
- – Rv Roof Maintenance Diamond Bar, CA
- – Rv Roof Maintenance Diamond Bar, CA
- – Rv Rubber Roof Maintenance Diamond Bar, CA
- – Rv Roof Repair Near Me Diamond Bar, CA
- – Rv Roof Repair Fiberglass Diamond Bar, CA
- – Rv Roof Repair Fiberglass Diamond Bar, CA
- – Replace Rv Roof Diamond Bar, CA
- – Rubber Roofing For Rv Diamond Bar, CA
- – Rv Rubber Roof Replacement Cost Diamond Bar, CA
- – Repair Rv Roof Leak Diamond Bar, CA
- – Rv Roof Replacement Diamond Bar, CA
- – Resealing Rv Roof Diamond Bar, CA
- – OCRV Center
Latest Posts
Air Conditioner Installation City Of Industry
Ac Not Working Beverly Hills
Furnace Replacement Toluca Lake
More
Latest Posts
Air Conditioner Installation City Of Industry
Ac Not Working Beverly Hills
Furnace Replacement Toluca Lake